Strippit Super 30/30, Custom 18/30 and Other
Strippit Single-Station Punch Machines
Machine Models, Some History, and Some Trouble-Shooting
George Wales Founded the Strippit Company in 1925. Some Early Products were
Preloaded-Spring Self-Stripping Punch Unit and Single-Station Punch Machines that
used this Strippit-Style of Tooling. Since then, Strippit Co. has been Bought, Sold,
and Traded like a Poker-Chip. Current Owner LVD Stupidly Sold-Off "Strippit-Tooling"
to Wilson Tool Co. in 2001. This Style Tooling is Now Known as "Thin-Turret Tooling".
Note, There is More on Tooling Sizes & Types Towards the BOTTOM of THIS Web-Page
under "Punch Tooling Sizes" & "Punch Tooling" Sections Below. READ--IT!
And there are 6 Tooling Co. Web-Links at Bottom of Web-Page "Strippit vs Amada".
LVD-Strippit has Also Stupidly Abandoned Manufacturing All "SAF" Machines
(Semi-Automated Fabricator) which Strippit called their Single-Station Manual Machines.
I will Divide S.A.F. Machines that Strippit Made, into 2 Broad Categories.
First Machine Category is Early-Type Punch Machines made 1925 to 1960. These
Machines had Flywheel on Back of Machine, used Awkward Punch Tool-Holder that Fit
Into Machine's Table Top, and were made in Models 10A, 10AA, 15A, Etc. Some
Models had a Duplicator Option. You would Punch a Master Pattern-Sheet, put it in
Duplicator Holder, then Manually move Stylus to each Pattern-Hole. Duplicator would
move Work-Sheet at same time under Punch Ram, and you would Punch Sheet as you
moved to each new position. There are Little or No Parts & Service Support Available
for Pre-1960 Machines. If you need a Part, you need to Make-It in a Machine Shop or
look for a cheap "Parts" Machine from a Used Machine Dealer, Auction, or Ebay.
We at Machine Technologies, Do Not-Support these Early Machines in Any-Way, As
We have a Firm Policy of NOT Working on Machines that are Older Than Our Wives.
Strippit Model 10AA Machine
Strippit Model 15A Machine
Strippit Model 10A Machine
with Duplicator
and Old-Style Punch-Holder
Second Machine Category is Late-Type Punch Machines made 1960 to early 1990's.
Most Machines were Mechanical using "New-Style Hydra-Mechanical Head" with
2-Flywheels in Front of Machine, with 1 on Each Side of Frame. There was also
2 Hydraulic Machines Made, Super 30/40HD and Super 36/75. All used New-Style
"Swing-Arm" Punch Tool-Holders that Locked under Punch-Head and was Easier to
use than Old-Style Arm-Holder. Punch Holders came in 4 Sizes, 1 1/4 Inch,
2x2 Inch Notch. 40 & 75 Ton Machines also used Optional 5 Inch Holders.
NOTE! Sizes Refer to Largest PUNCH-Size that
Holder Could Take, and Is NOT the Actual Hole-Size in Swing-Arm Holder!
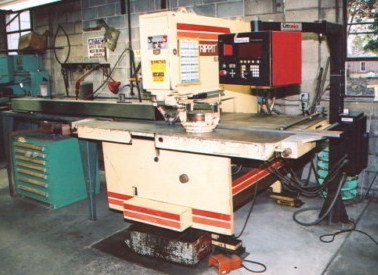
Machines Models were Sonic 18/30, Custom 18/30, Custom 30/30, Custom 30/40,
Super 30/40(Mechanical), Super 30/40HD (Hydraulic), and Most-Popular Super 30/30.
Model Name means following; "Custom" means the Work-Table is Fixed in it's Position,
where "Super" means Work-Table can be Moved Up or Down several Inches in Relation
to Punch-Die Top Surface with a Hand-Crank Wheel on Lower Front of Machine.
Moving Table Down gives you Clearance around Die, so you could Punch
a Hole in a Metal Box, Angle-Iron, or some other Already Formed Metal Part.
First Number, as in 18/30, means Throat-Clearance, in this case 18 Inches. Second
Number Means Tonnage Machine Supposedly could Punch. These "30 Ton Machines"
were Not Really 30 Ton Machines, they Spray-Out Oil & Break Piston if used on Full-Capacity 30 Ton Holes or 1/4" Thick Materials. I Advise NOT Using them on over 20 Ton punch-holes or thick material. Buy a Super 30/40HD Hydraulic for High-Tonnage Holes!
Super 30/40-Mechanical Machines were made in 1960's & 1970's, and were just a
Super 30/30 with Bigger Flywheels & Motor and were Definitely NOT 40 Ton Machines!
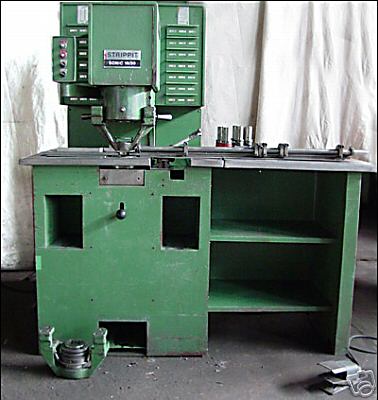
Strippit Model Sonic 15B,
Old-Style Machine with New Style Swing-Arm Punch-Holder
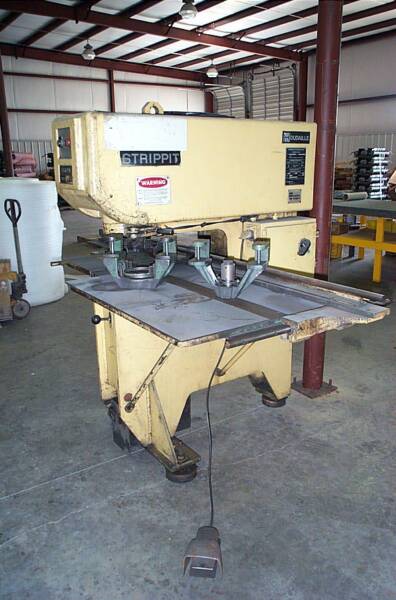
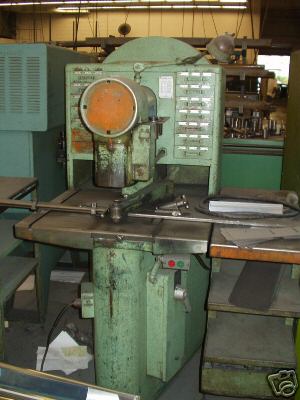
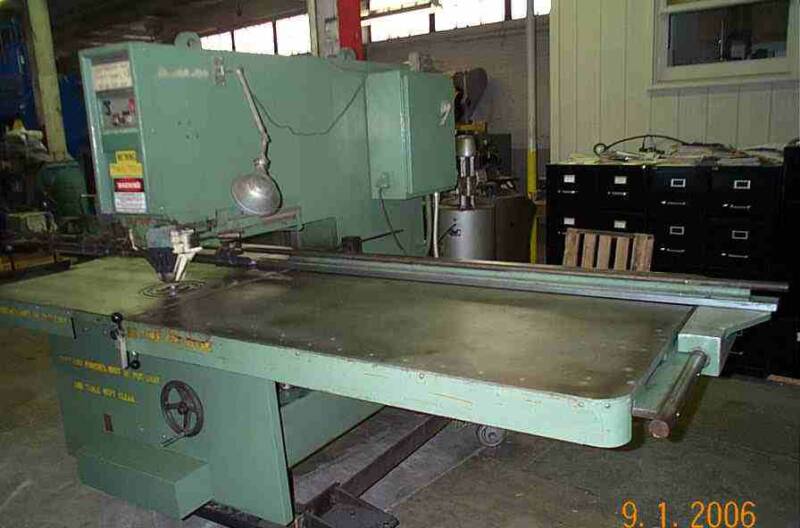
Strippit Custom 18/30 Machine
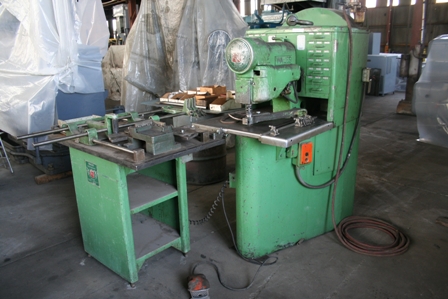
Strippit Super 30/30 Machine
with Table-Extension Option
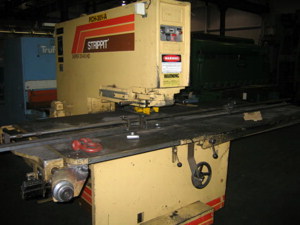
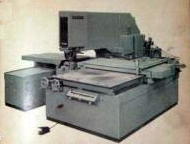
Strippit Super 36/75
In 1960's & 1970's, Strippit made the
Super 36/75 Machine.
These were Very Heavy-Duty Machines
with a 36 Inch Throat and
Could Punch 75 Ton Holes!
They used a Hydraulic Piston Driving a
Mechanical Knuckle-Mechanism that
Drove the Punch-Ram.
Because of Problems trying to Punch 30 & 40 Ton Holes with Mechanical 30/30 & 30/40
Machines, Strippit came out with Super 30/40HD (Hydraulic) Machine in 1976. These
Machines had No-Flywheels, and used 10HP Electric Motor & Pump to Power Hydraulic
Ram Punch-Head. Machines would Punch an Honest 40-Ton Hole and were Best Strippit
S.A.F. Machines. Recommended to punch Big Holes in Thick Material or Stainless Steel.
Some Used Machine Dealers list Mechanical Super 30/40 Machines as the Superior
Super 30/40HD Hydraulic Machines, because they Do Not Know any Better, or are
Dishonest. Always Check-Out Machines Carefully BEFORE You Buy, NOT After!
And Make Sure you get BOTH 1 1/4" & 3 1/2" Swing-Arm Holders and 1 1/4" Die-Adaptor!
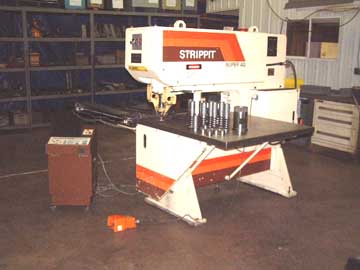
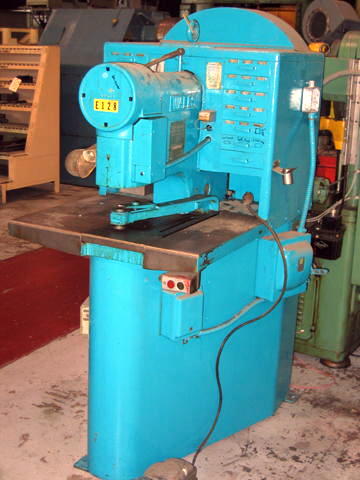
Strippit Super 30/40HD Machine
Painted 1980's Yellow & Racing Stripes
Strippit Super 30/40HD Machine
Painted in The 1970's Puke-Green

This page was last updated: April 27, 2026
I specialize in Strippit HECC80-Control Turret-Machines.
However As a Service to You, I Add to This Web-Page Trouble-Shooting
and Repair-Information for Single-Station Strippit Punch Machines.
I have a Few Repair & Operation Manuals For-Sale, and Repair Parts Listed on this Webpage. Buy a Manual and Learn to Maintain & Repair Machine Yourself!
If You Need Field-Service Repairs In Your Shop, Call These Servicemen;
Tom Penrod, Tracy, CA Phone 209-814-7626 West-Coast Service Area.
Joe Normoyle, La Puenta, CA Phone 626-826-0007 West-Coast Retired!
Denis Porter R.I.P 7/9/10 was Best In The World Repairing S.A.F. Machines.
Alan Suda 708-826-9845 Mid-West. Good on S.A.F. & CNC Retired!
Bob Kelly 815-355-0531 Mid-West. Good on S.A.F. & Fanuc CNC Machines
Carl Wilson 909-633-9050 Los Angles & West Coast. S.A.F. & CNC Machines.
More servicemen listed "Independent Strippit Control & Machine Repair Service"
Web-Page, & All 6 U.S. Punch-Tooling Companies are Listed at Bottom of My
"Strippit vs Amada" Web-Page. Use The Hot-Link Buttons Below!
Trouble-Shooting & Repairs
S.A.F. Machines are Quite Reliable. But as Most Shops Do NO Maintenance At All,
Machines are now 35 to 65+ years old, and Various Maintenance "Rocket-Scientists"
may have Modified Electrical Components, they certainly do develop issues.
Some Common Problems are Listed Lower in This Web-Page.
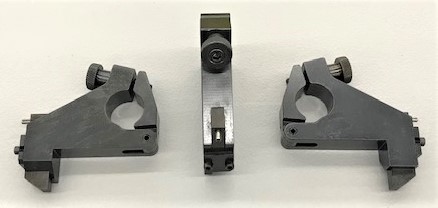
1--- Swing-Arm Holders
Often Shops Buy a Used Machine but, Fail to get
Both 1 1/4" and 3 1/2" Holders! Or when Using Machine, Operators switch Back & Forth
between 2 Holders and Eventually a holder Falls Off Machine Table and Hits-The-Floor.
Holder will then break into 2 pieces because Strippit's Holders were Brittle Cast-Iron.
You CAN NOT Fix-It, Many have Tried! Our's were Made of Cast Steel but, are Sold-Out!
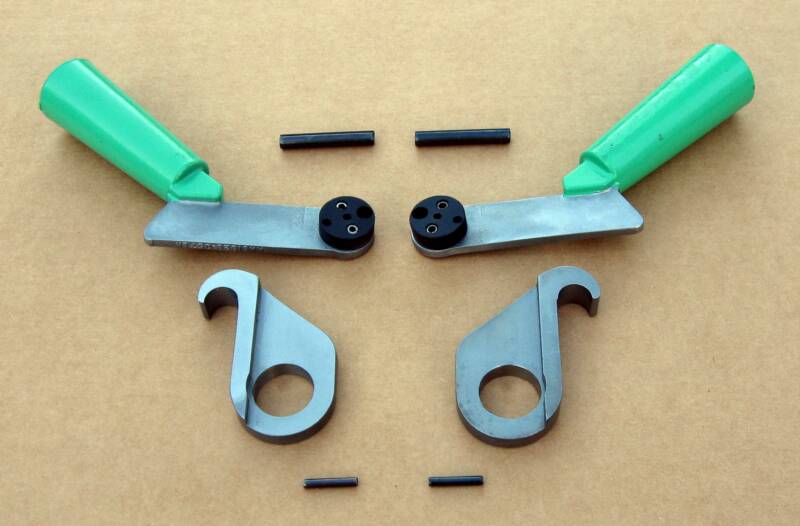
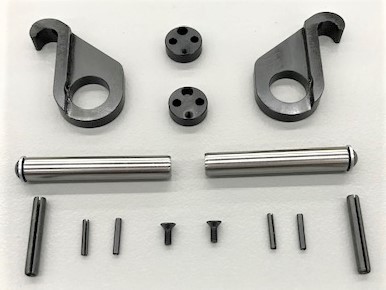
6 --- Hooks & Handles
Left & Right Hooks and Left & Right Handles Lock-In Swing-Arm Holders to Machine.
Very Commonly Worn-Out on Single-Station Machines so Will NOT Stay Locked-In to
Keep Swing-Arm Holder Tightly-Closed & Aligned. This Allows Swing-Arm Holder to
Move and Wobble causing Punch and Dies to Hit & Wear & Break with Bad Punched-Hole Quality. If your Knuckle-Head Operators have Bungee-Cords Holding Handles-Closed so
it Will Punch it will NOT Hold-Alignment when Punching and your Hooks & Handles are Worn-Out! Usually Replacing Hooks & Cams & Lock-Pins will Fix Problem!
New Handles are Not Available, but are usually OK. May Require New Black Delron
Cams to be Replaced, which are in Our Kit. Some Early Machines used Steel-Cams.
We are almost out of Hook & Handle Kits, when Gone, we are Not Making any more!
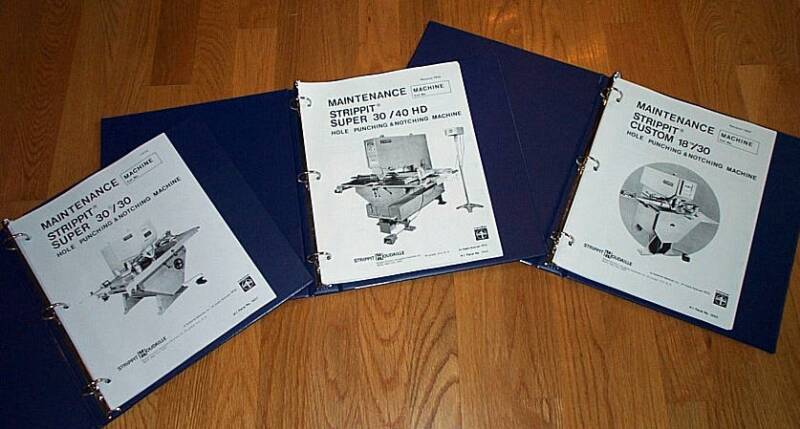
7--- Maintenance
Manuals
If you do Not have a
Manual for Your Machine
You Need To Get One!
and Read-It!
We have a few Manuals
left for
Custom 18/30
Super 30/30
Super 30/40 HD
5 --- Bushings
1 1/4" & 3 1/2" Swing-Arm Holder Bushings Wear-Out from Operators NOT using
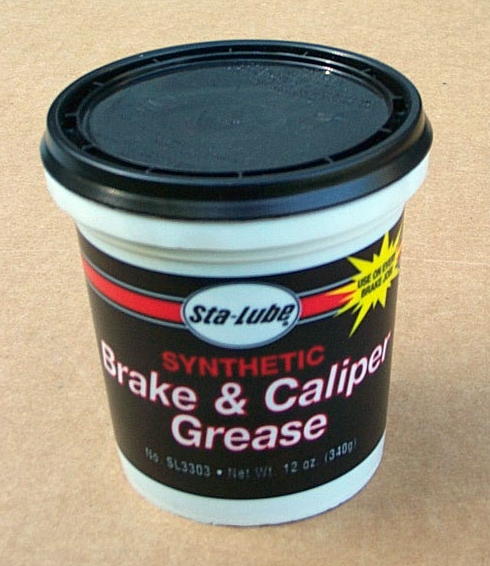
Molykote GN Grease on Tooling!
Wear allows Tools to Move & Deflect, causing
Tool-Wear & Burred Holes. If you can Rock a
New Tool Back & Forth Much, Bushing is Worn and should be Replaced & Aligned.
#100734-000 3 1/2" Bushing
#100230-000 1 1/4" Bushing, 2.375" Flange
At Right is a 0 & 270 Degree Bushing.
Degrees are Counted Clockwise from Front.
Original #62533-000 Bushings Not available.
Some Old 1 1/4" Bushings may measure
2.437" across Top-Flange, use 2.375" Now.
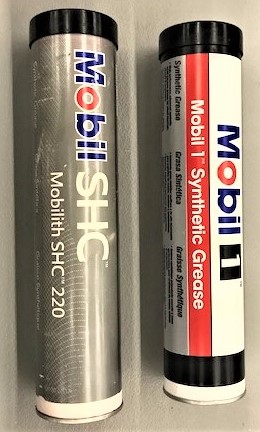
8 --- Grease Your Bearings!
Left & Right Crankshaft Bearings, Pitman Bearing, and
Ram-Housing Need to be Greased Every Week. If you don't,
Bearings Gall-Up & Drag on Crankshaft, Slows Crank Speed causing Loss of Punch Tonnage and Crank can Grind to a Halt & Motor Overload will Trip-Out. You Now Need Very Expensive Machine Rebuild. Strippit specified Mobil EP1 grease but,
I only use Synthetic Grease which Protects & Performs Better
at High & Low Temperatures & does not dry-out and turn to thick-wax! I use Mobil Synthetic
Chain grease-gun to Machine or it will Grow Legs & Walk-Away!
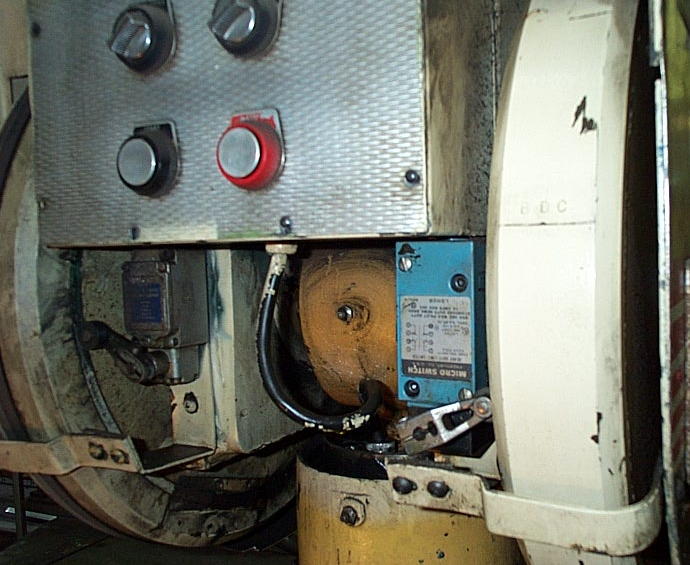
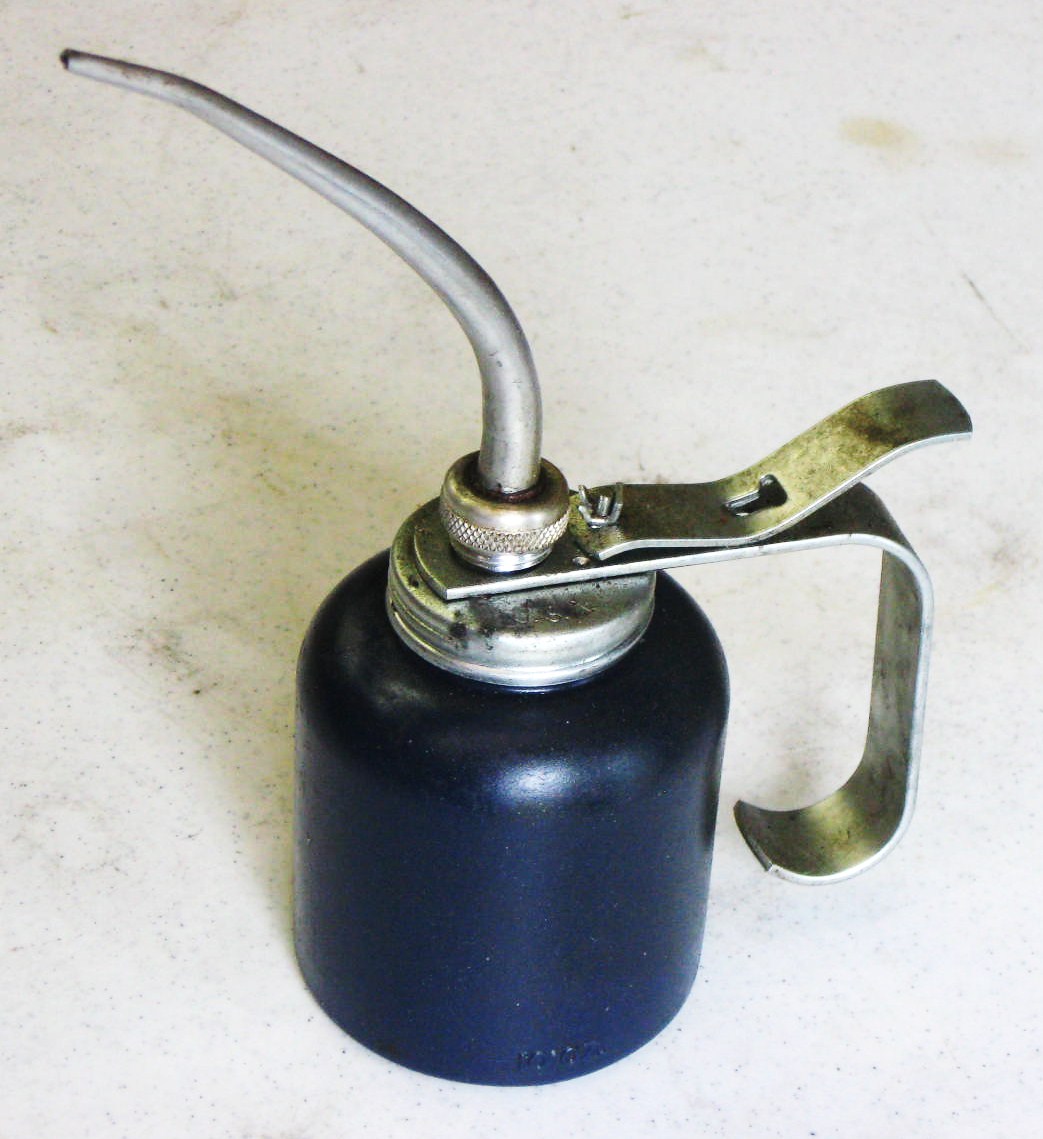
9 -- Maintain Proper Oil Level Inside
Punch-Head! Rotate Right Flywheel
Until Scribed "B.D.C. Line" (Bottom
Dead-Center) is Lined-Up with
Bottom of Electrical Box. MUST Use
#49579-000 Dip-Stick to Maintain
Proper Level of Mobil DTE-24 ISO
Grainger Co. is 1 Source of DTE-24 Oil.
Use Old-Fashion Oil-Can through little
Trap-Door on Top of Piston to Add Oil.
Too-Little Oil will Short-Stroke Punch.
Too-Much Oil may Over-Stroke
and Spray-Out Oil while Punching.
Chain Your Dip-Stick to Machine or it
will Grow Little-Legs and Walk-Away!
If Your Dip-Stick is Gone, We have
Punch-Head Dip-Sticks In-Stock!
4 --- Lock-Pins
#62560-000 Set of 2 Lock-Pins on Each Swing-Arm that the Hooks
Lock-on to. Lube with Light Oil, should be able to Rotate Freely or will Develop a Wear-Spot Alignment Problem and need to be Replaced. When Replacing Hooks & Handles Always Replace
Lock-Pins. 1 Set of Pins comes in "Hook & Handle Repair Kit" but most Machines have 1 1/4" Swing-Arm and 3 1/2" Swing-Arm,
So you Need EXTRA Set of Lock-Pins for your 2nd Swing-Arm.


12 --- Some Common Electrical Problems. This Section Applies to Custom 18/30,
Custom 30/30, Super 30/30, Custom 30/40-Mechanical, and Super 30/40-Mechanical Machines. Does Not Apply to Hydraulic Machines Super 30/40HD and Super 36/75.
Trouble-Shooters need to Understand that SAF's were made for over 40 Years with
Many Variations in Electrical Wiring, Electrical Components, and Mechanical
Components. You need to Understand how it Works & a Maintenance Manual with
Electrical Schematic to do any Trouble-Shooting. Manual has Trouble-Charts & Theory.
As a Rule, an Electrical Device Fails in 1 of 2 Ways;
--- It "Shorts" or "Short-Circuit" meaning Very-Low or No-Resistance.
--- It "Opens" or "Open-Circuit" meaning Very-High or Infinite-Resistance.
--- Or It is Broken or Misadjusted or Miss-Wired or is Wrong Repacement Part.
12A --- Fuse Blows when you Try to Punch in Single or Nibble Mode. Caused by Shorted Punch Solenoid Coil or wiring, Normal Coil Resistance is about 15 Ohms.
12B --- No Punch in Single or Nibble Mode.
--- Caused by Open Punch Solenoid Coil, Normal Coil Resistance is about 15 Ohms.
--- Caused by Broken-Wire "Open" going to the Punch-Piston & Solenoid Coil.
--- Caused by Tool Handle Lock-Switch or Lock-Switch Wiring being Broken or Open.
--- Caused by Broken or Open Switch in Footswitch or Wiring to switch.
12C --- Machine Will Punch with Tool Handle Open and NOT Locked-In.
--- Caused by Tool Handle Lock-Switch being Shorted or By-Passed.
12D --- Punches OK in Nibble, but Blows Fuse 4FU and won't Punch in Single Mode.
--- Caused by Control Relay CR1 Coil Short, Normal Resistance about 250 Ohms.
--- Caused by Shorted-Wiring To or From Single Switch, 1LS, 2CR, 1CR Coil.
12E --- Punches OK in Nibble, No Punch in Single. Some Causes;
--- Limit Switch LS1 Open. LS1 is Normally-Open & Closes when Activated!
--- Limit Switch LS2 Open. LS2 is Normally-Closed & Opens when Activated!
--- Control Relay CR1 Failed or Coil Open, Coil About a Couple Hundred Ohms.
--- LS1 or LS2 Wired Wrong. LS1 is Normally-Open, LS2 is Normally-Closed
on most Later Machines, but Normally-Open on VERY EARLY 1960's Machines
which also did Not have LS3 Double-Punch Prevent Switch!
--- Wrong Switches used, Switches Miss-Wired, or Switches Misadjusted.
12F --- Varying Short to Normal Stroke in Single, Normal Operation in Nibble.
Caused by Limit Switch LS1 Short. LS1 is Normally-Open & Closes when Activated!
12G --- Starts Nibbling when Punch in Single Mode, must Turn-Off Machine to Stop.
Caused by Limit Switch LS2 Short. LS2 is Normally-Closed & Opens when Activated!
12H --- Fuse 4FU Blows as Punch Ram starts to move down in Single or Nibble.
--- Caused by Burned-Out & Shorted Solenoid Coil, or Wiring to Solenoid Coil
--- Caused by Control Relay CR2 Coil Short, Normal Resistance About 2000 Ohms
12i --- Machine continues to Punch in Single as long as Foot Petal is Depressed.
--- Caused by Control Relay CR2 Open, Normal Resistance is About 2000 Ohms.
12J --- No Punch in Single, but Nibble Punches Without Depressing Footswitch.
Caused by Limit Switch LS3 Short. Note! Early Machines do Not have this LS3 Switch
which was Added to Eliminate Possibility of Double Punching in Singe-Punch Mode.
12K --- Constant Nibble Punching in Single Mode, Normal Operation in Nibble Mode.
--- Caused by Limit Switch LS3 Open.
12L --- 1 Punch at Power-On in Single or Punching in Nibble
without depressing Footswitch. --- Caused by Shorted Footswitch or Wiring
12M --- 3-Phase Fuses Blow. Caused by;
--- Wrong A.C. voltage to machine or motor & transformer not wired for correct voltage
--- Bad (Shorted) Press-Drive Motor
--- Stalled Motor from Bad Crankshaft Bearings or from Old Hardened Grease
--- Shorted / Melted Step-Down Transformer. Caused by Wrong A.C. Voltage to
Machine or Big-Loads Plugged-In to 120 VAC Machine Power Socket, like a
Cooling Fan. This Power-Socket was made ONLY for a 60 Watt Work-Light!
Note! Very Early 1960's Machines WITHOUT FRONT--LS3 Switch had LS2 Switch on
Right-Flywheel wired Normally-OPEN. Later Machines had Wiring Changed with
Front-LS3 Switch ADDED and LS2 Switch on Right-Flywheel wired Normally-CLOSED.
LS1 Switch on Left Flywheel has Always been wired Normally-OPEN.
Punch-Tooling Punch-Tooling Punch-Tooling
I get many Calls on Where to Buy NEW Punch Tooling & Dies.
Sadly and Quite-Stupidly, LVD Strippit Sold-Off ALL Their Tooling-Lines, and
NO Longer Makes "Strippit Tooling" that The Strippit Company was Named for!
This Type of Tooling is NOW Known as "Thin Turret Tooling".
Most Strippit Single-Station SAF-Machines Use Only "Thin Turret Tooling".
A very few Single-Station Machines that had a CNC-Control Factory-Installed,
like the "AG's" (Auto-Gageing) and "Super 750's", May have been
Optioned & Manufactured to take "Thick-Turret / Long / Amada" Type of Tooling.
I have 6 Hot-Links to U.S. Manufactures of Punch-Tooling at Bottom of Web-Page
So, PLEASE Go To THAT Web-Page To See These 6 Tooling Company Links!!!

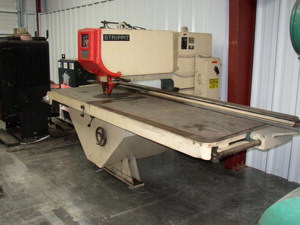
2ND Generation is the "AG's". Made in Late 1980's & Early 1990's, Strippit took their Custom 18/30 & Custom 30/30 SAF Machines and Bolted-On Cheap Earlix
Japanese 2-Axis CNC Gageing Control, to make a Auto-Gageing (AG) Machine.
At Left, is 1987 Vintage Super 30/30AG Machine with "Long Tooling" Option.
-- Earlix Control Co. is Out of Business!
-- NO Control Parts are Available!
-- NO Strippit Support is Available!
-- NO Service is Available!
-- AVOID These "AG" Machines!!!
-- AVOID means don't Fucking Buy one!
CNC Side-Gage & Auto-Gage Machines
Strictly Speaking, These are Not SAF Machines.
They are Auto-Gageing (AG) and NC & CNC Single-Station Punch Machines.
Strippit has had 4 Generations of these Types of Machines, ALL Should Be AVOIDED!
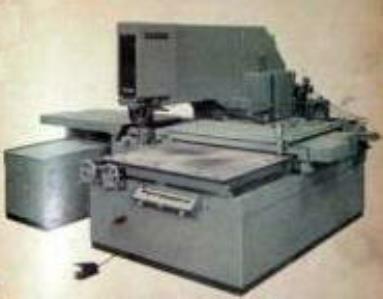
1St Generation was FM36/75 (Fabra-Matic) Machines. Strippit made Both Manual
Super 36/75 SAF Machines as well as Automatic NC-Control Fabra-Matic 36/75 Machines in 1960's & 1970's with a
Hughes 200 or General Electric NC-Control.
NC Controls had No Memory, simply read Information from Papertape, moved X & Y Axis with the Part-Sheet, and Punched when In-Position. A Program Stop was made when Operator was Required to Manually Change Tool. No Parts & No Service is Available for these Machines.
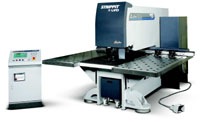
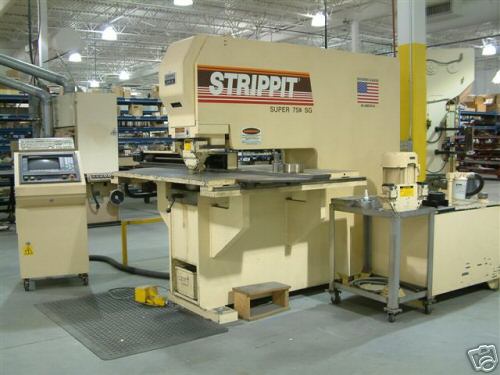
3ND Generation is the SG750, FC750SG, Super750, Super750SG, Super750/40, Super750/40SG, Which are Pretty-Much All the Same Machine as
Strippit Stupidly, Just Couldn't make up their Mind on What to Call Them!
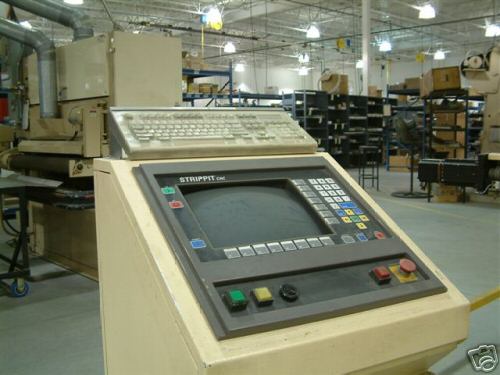
In 1990's, Strippit Finally designed a Decent Auto-Gageing Single-Station Machine, But Ruined It by putting another Crappy Strippit PC-Control on it Made with Consumer Type
PC-Computers which are NOT Designed to last more than 3 to 5 Years. And LVD-Strippit has a Reputation for NOT Supporting Their Old PC-Controls. In this Case "Control" Requires Old PC-Computer that Runs on DOS ( DOS Pre-Windows from Early 1980's! )
or Old Windows 95, so when you have Problems, you find Newer Computers and Windows DO NOT WORK on it, so you Can't Get Parts to fix it! I get many calls on Super750's with Computer Problems. Again, Machine is Good, BUT AVOID because
there is NO Service, NO Parts, NO Tech Support for Strippit's Crappy PC-Controls!
I would Replace Machine with Fiber-Laser or Amada Turret Punch.
The 4ND Generation is the "Alpha's"
These were a Updated & Redesigned Super 750 and were Good Machines that Worked Well, When New. Machines used yet Another Version of Strippit's
Crappy PC-Control, Which is Machine's Problem Area. Production Started
about 2005 & ended about 2007.
AVOID (Don't Fucking Buy) Because
NO Service, NO Parts, NO Tech Support for Strippit's Crappy PC-Control


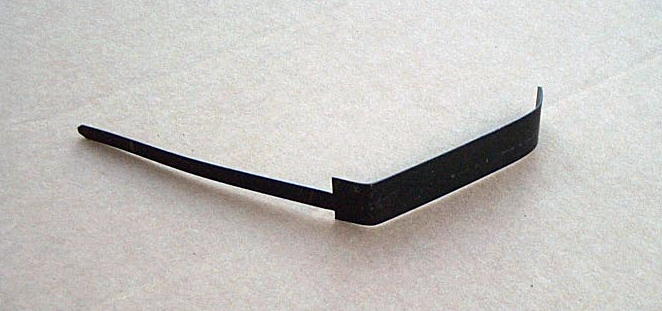
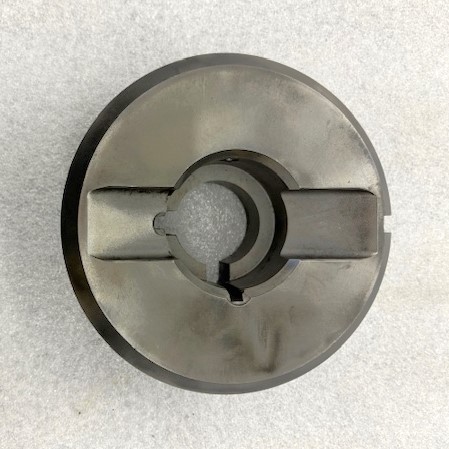
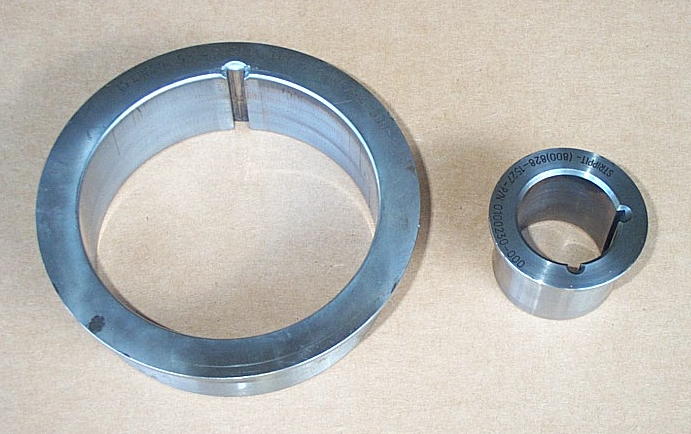
3 --- 3 1/2" to 1 1/4" Die Adaptor
30-TON Machines came with Die-Pedestal that
Accepts a Standard 3 1/2" Die.
To Use 1 1/4" Tooling you need 1 1/4" Swing-Arm
Tool-Holder and 3 1/2" to 1 1/4" Die Adaptor.

Punch Tooling Sizes!
As there are Thousands of these S.A.F. Machines Out-There, many New People & Small-Shops are Picking-Up these Machines at Local Shops or at Auctions,
and have NO Idea What The Tooling Sizes Mean, and are Thoroughly Confused.
For Instance, they WRONGLY Measure "The-Hole" in their 1 1/4" Holder, and see
that it is 1 1/2", and They Think they need 1 1/2" Tooling, which Does NOT Exist!
For Standard "Strippit-Style" "Thin-Turret" Tooling, There has Only Been 4 Sizes,
1 1/4", 3 1/2", 5", and 2" x 2" Notch Tooling!
For Example, 1 1/4" Tooling means a type of Small-Tooling that can hold a Punch from
0 to 1 1/4" in Size. Obviously, Punch-Holder that Holds Tooling Must be Larger
than Biggest Punch Tool Size. All 1 1/4" Type Punch-Holders are 1 1/2" in Diameter.
And By a Wild--Coincidence, This is Same Size of the "Hole" in a 1 1/4" S.A.F.
Swing-Arm Holder or a CNC-Turret 1 1/4" Station, that the 1 1/4" Tooling Fits into!
SO, TO RECAP;
---- 1 1/4" Type-Tooling takes 0" to 1 1/4" Punch Sizes,
and fits into a Holder of 1 1/2" in Diameter.
---- Notch-Tooling takes Special 0" to 2" Punch Sizes, but is Almost Always a
2" x 2" Square, and fits into a Special Notch-Holder that is 3 1/2" in Diameter.
---- 3 1/2" Type-Tooling takes 0" to 3 1/2" Punch Sizes,
and fits into a Holder of 4 3/8" in Diameter.
---- 5" Type-Tooling takes 0" to 5" Punch Sizes, and fits into a
Holder of 5 7/8" in Diameter. Note, I believe that 5" Thin-Turret Tooling is
NO Longer Manufactured Anywhere, so all 5" Holders & Tooling is Worthless!
Rare "2 x 2 Notch" Swing-Arm Holder. So Named because they almost always have a 2" x 2" Square Punch in it for Corner-Notching and Blanking-Out Large Holes. These CAN-NOT Hold
a Standard 3 1/2" Tool!
This uses same 2" x 2" Notch Punch
Tool used in "Notch Station #1"
in Older Strippit Turret-Machines.
There were Large 5" Swing-Arm Holders
available for 40 Ton S.A.F. Machines.
These Holders & Stripping-Guides were very Heavy and Hard to Handle. 5" Swing-Arms, 5" Punch-Holders, and 5" Tooling are No Longer Manufactured, so are Now Useless.
10 --- #49011-200 Solenoid
Solenoids Burn-Out when Failed Switches allow A.C. Power to be on Continuously. Find Failure or you will Burn-Out Solenoid again! "Nibble Mode"
Punching can also Burn-Out Solenoids! A Good
Solenoid Coil is About 15 Ohms , a Bad Coil is
Rebuild Punch-Head to Replace, a Pain-in-the-Ass.
Get Rebuild Kit Below! Align Solenoid-Plunger
with Slot in Solenoid or you will Smash-It when
you Jack-Up Housing back in place!
When Energized, Solenoid pulls-in Plunger,
which pulls-up Stop-Bolt, which Pulls-Up & Closes
Piston-Valve to Trap-Oil on next Piston down-stroke which pushes Ram down to Hit Punch-Tool.
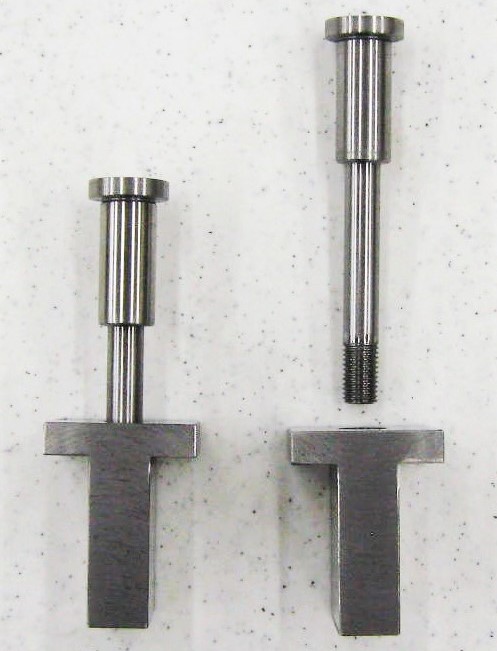
Over past 65 years Strippit used several Plunger &
Stop-Bolt combinations to try to improve punching. There were at Least 6 Stop-Bolt Types!!!
#71800-000 Short-Type, 1.900" long
#85541-000 Spring-Loaded int.-thread 3.125" long
#74579-000 Solid External-Threads 3.281" long
and Bolts Must Use their Matching-Type Plunger!
We now Stock the
Most Common & Best-Type Matching--SETs of;
#74579-000 Solid Stop-Bolt, The Best-Type and
#62874-000 Plunger, for the Solid Stop-Bolt
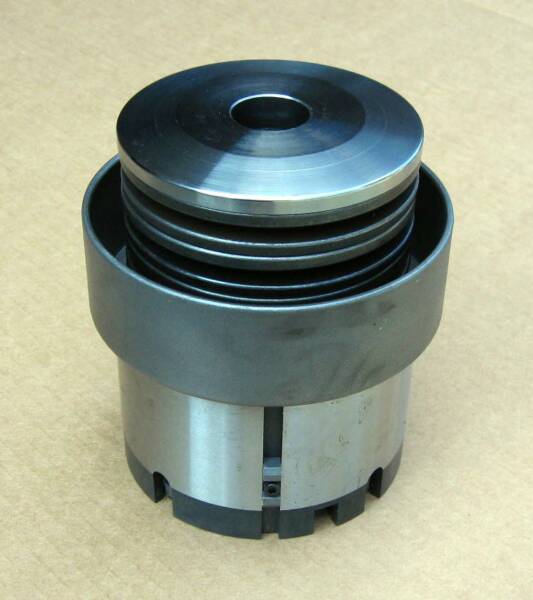
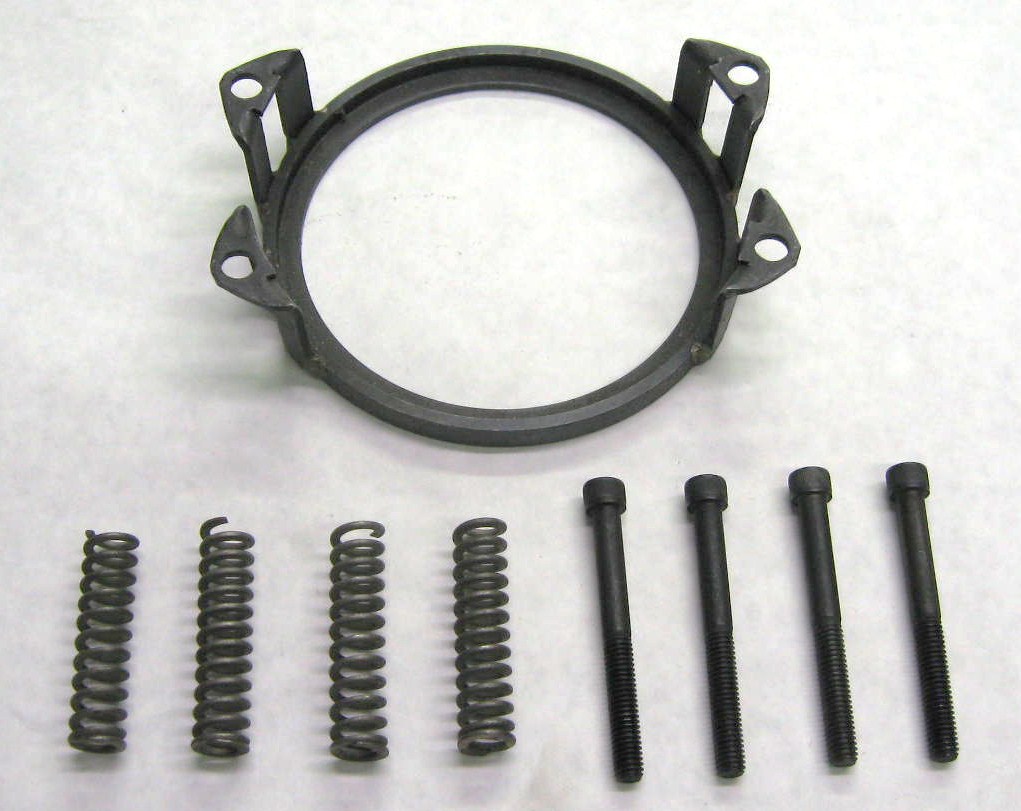
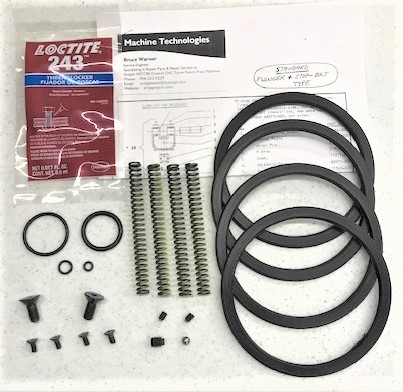
11 -- #119951-000 Punch-Head Rebuild Kit. When you Drop-Down Ram-Housing
ALWAYS Rebuild Punch-Head with New Packing-Rings & Ram-Springs!
1 -- #10461-000 Steel Drain-Ball
1 -- #10925-000 Set-Screw, Steel Ball-Retainer
0 -- #11153-000 Retainer-Ring Set-Screws without Ny-Loc, Or
#10871-000 Retainer-Ring Set-Screws with Ny-Loc Thread-Lock
0 -- #11143-000 Nylon-Ball, used under Retainer-Ring Set-Screws, 1-Extra
2 -- We Now Replace Plain Set-Screws & Nylon-Balls with Brass-Tip Set-Screws!
2 -- #10859-000 Flat-Head Socket-Head Cap Screw with Ny-Loc, for Ram-Plate
4 -- #11489-000 Flat-Head Socket-Head Cap Screw, for Cover-Plate,
Note, Some Manuals List Incorrect #11499-000 for this Part!
1 -- #12593-000 O-Ring
1 -- #16144-000 O-Ring NOTE! NOT All O-Rings will be used, as there are
1 -- #14360-000 O-Ring Different Machine Versions built over 65+ Years!
1 -- #10651-000 O-Ring
1 -- #49509-000 Set of 4 Packing-Rings
4 -- #49516-000 Ram Springs
1 -- Locktite-243 Thread-Locker for use on all Screws & SetScrews
Punch-Head Rebuild Kits
We have Punch-Head Rebuild Kits
with Parts Needed to Rebuild your
Strippit 10AA, 15AA, Super 30/30,
Custom 30/30, Sonic 18/30,
Custom 18/30, Custom 30/40,
Super 30/30-AG, 18/30AG
and Super 30/40-Mechanical
( NOT 30/40-HD ) Punch-Heads.
Included in Our Kit,
on the Screws to keep them Tight!
14 --- #62081-000 Finger Stop Assembly for Side-Gaging. Make sure you get
these when Buying your Machine! Strippit also made Micrometer Side-Stops
that could be accurately adjusted for more Precise Gaging than Finger-Stops.
BUT, I would have a DRO Electronic Scale and Readouts Fitted to Machine,
like these ACU-RITE DRO Digital Readout Systems.
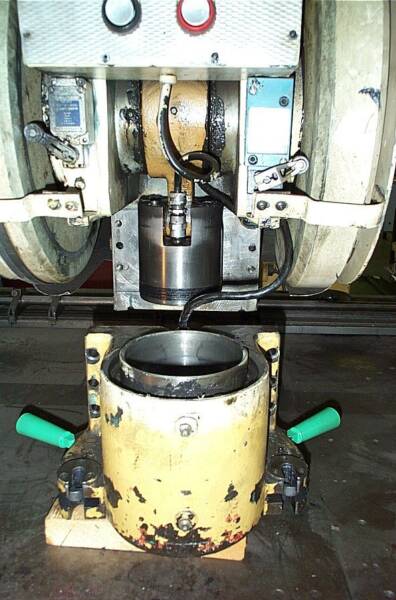
The Following is a Few Tips on Rebuilding the Punch-Head.
Make Sure You Have a Manual Before You Start Rebuilding!

Block-Up Head so it won't Fall. You will Need a Allen Hex-Socket Set. A Pipe makes a Good Torque-Amplifier to Loosen & Tighten Bolts.
I just Put-In New Hooks & Handles in this Machine, as Old Handles would Not
Lock-In, and Swing-Arm could be Rocked Back & Forth, so it Ate-Up Tooling.
There is a 1/8" Roll-Pin, that Sticks-up 3/16", to Engages Slot in Bottom of each Hook, to make Hooks Open when you pull Handles so you can Remove Swing-Arm.
Unfortunately, Pins are Always Broken.
Put in New Pins, which are in our Kit.
Packing-Ring Retaining-Ring Usually has
2 Indentations on Bottom for a Special 2-Pin Spanner Wrench, which you can make.
Or you Tighten Ring as much as you can by Hand, then Tap-It Tighter with a Small Pin-Punch and Small Hammer,
which Will Bugger-Up Screw-Holes.....
Try Hard NOT to Bugger-Up the
Ring & Piston & Set-Screw Threads!!!
--- Make Sure Solenoid and
Solenoid-Plunger are Aligned,
or you could Break Solenoid
if you Force-Up Ram-Housing!
--- New Packing-Rings sometimes make it Difficult to get Ram-Piston back into Housing. A Second Set of Hands can
Help a Lot!
--- Carefully Pry-Up and
Block-Up Ram-Housing
into Position.
--- Thread a Bolt into both
Dowel Pins, and Carefully Tap
Dowels back into their Holes.
Do NOT Damage Special
Taper Dowel Pins as they are NO Longer Available! Do both Sides several times to Locate the Housing Well. Remove 2 Bolts.
--- Put in the 4 Bolts, and
Tighten them Back & Forth
Several times.
13 --- Clean & Lube Tooling Regularly!
Inside Tools to Prevent Galling & Cold-Welding
between Punch-Tool & Stripping Guide.
AND Outside of Tools to Prevent Wear on
Stripping Guide and Holder and Bushing!
Also, Grease-Up your Hooks & Handles to help keep them from Wearing-Out!
This is 1 of the Best Lubes I have used.
Synthetic-Base has High Film-Strength, does Not Dry-Out and Harden like Regular Grease,
and has Extreme Pressure Additives
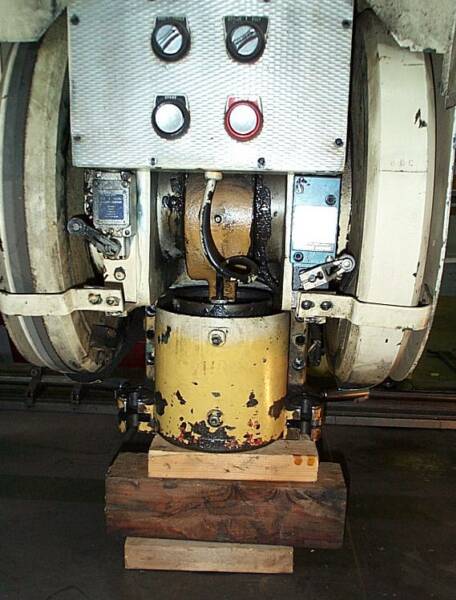
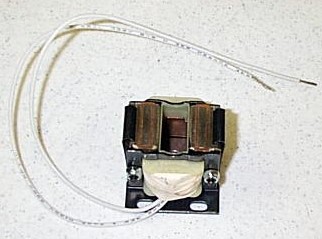
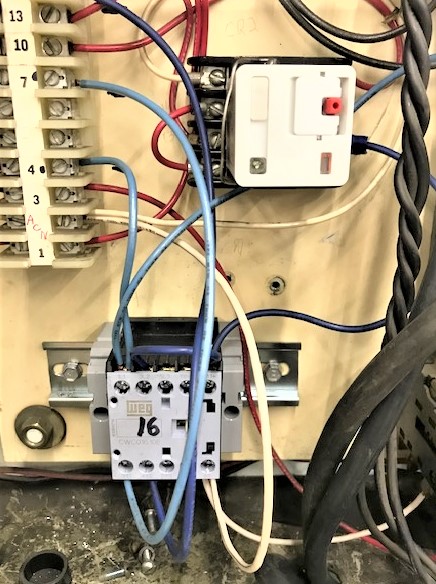
This Customer Moved & Wired-Up His Super 30/30 All By Themselves. But, they Put the Wrong Voltage on it and Melted Transformer. Strippit Made these Machines for 40+ Years and Used different Transformers. It is Difficult to get Exact Transformer to Match Bolt Holes and Limited Space Inside Electrical Cabinet. We Do Stock a
Heavy-Duty .35KVA Replacement Transformer.
In Photo we used Enclosed .25 KVA Transformer,
(.35 or .5 KVA is Better) and just Mounted it on Back of Control Cabinet. Quick & Easy to Do.
Remember, if Changing Machine Voltages;
--- Pull-Motor Out & Redo Voltage Tap-Wires
--- Retap Transformer Wires
--- Resize & Change Fuses
--- Resize & Change Motor Overload-Heaters
--- Tag-Machine with New Voltage Information!
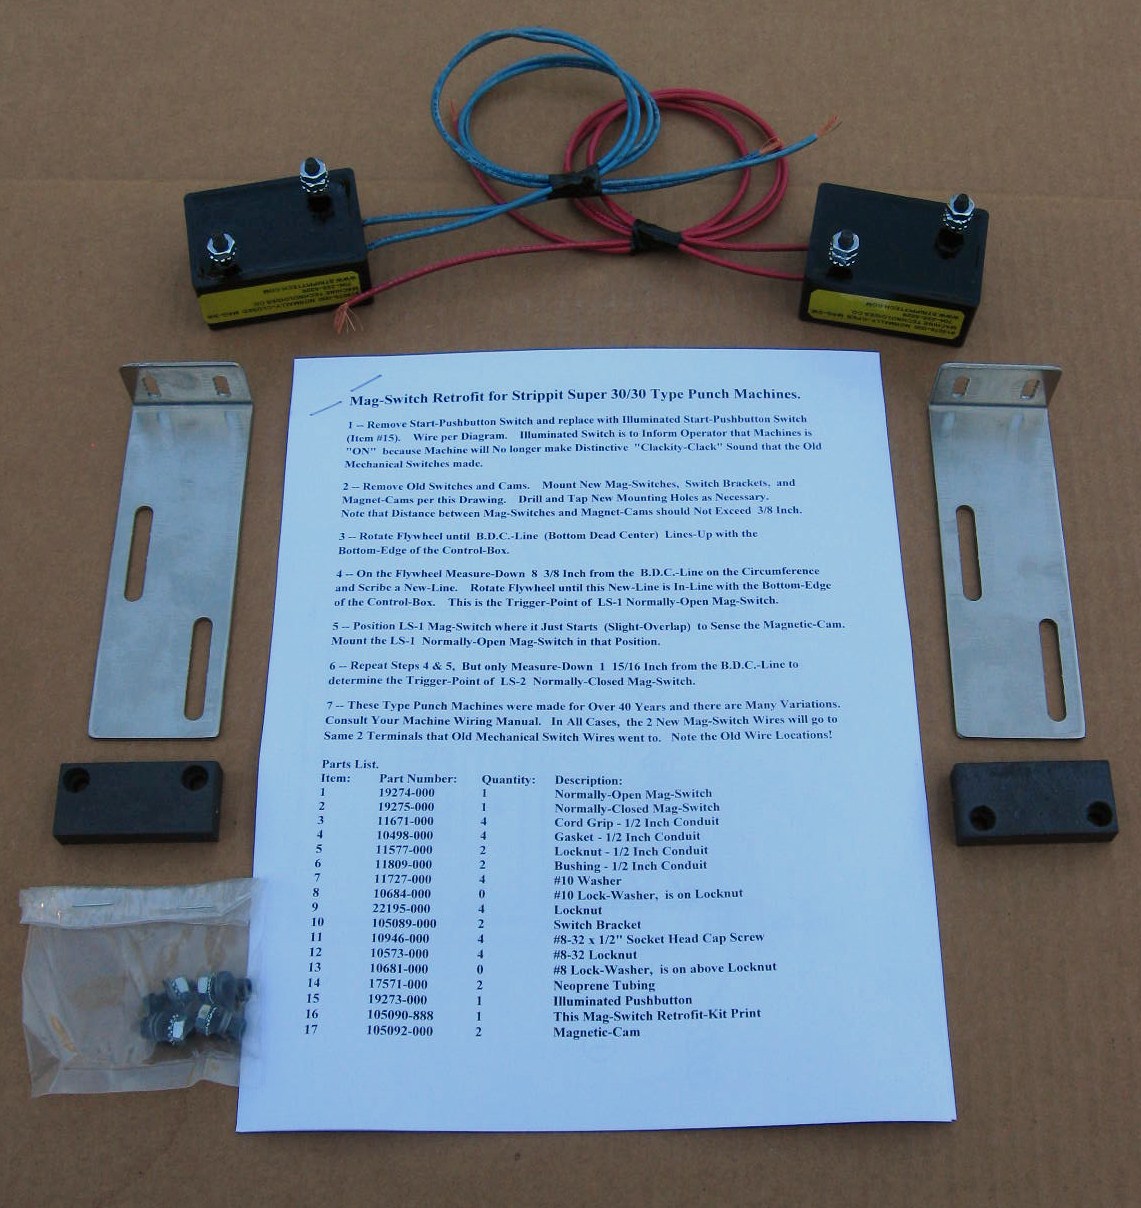
Mag Switch Retrofit
One of Many Machines Variations was in LS1 & LS2 Switches activated by 2 Flywheels. In 1960's, 1970's, and 1980's different Brands of Mechanical Switches were used, Allen Bradley, MicroSwitch, G.E., Etc. We Only Sell MicroSwitch Types as they Work Best!
Switches made Constant "Clacking" Sound as they were Hit by Flywheel Cams when Machine was On. Because Switches are Constantly being Hit Hard by Flywheel-Cams about Twice a Second (60,000 Time a 8-Hour Shift!) when Machine is On,
Even When Not Punching, Switch life could be Short. Turn-Off Machine if Not Using it!
In Early 1980's, Switches were converted to Non-Contact Proximity Switch that was activated by Magnets Mounted on 2 Flywheels. Machines now left Strippit Factory with these Switches as Standard. Note, These Switches also will Eventually Wear-Out!
There was also a Retrofit Kit #105090-000 to Convert Older Machines to this new type
of Switches, and many Machines had this Kit Installed in the Field.
As Machine would No longer make the "Clacking" Sound, a Green Indicator-Light was
added to Upper Panel as part of the Kit to Alert Shop People that Machine was "On".
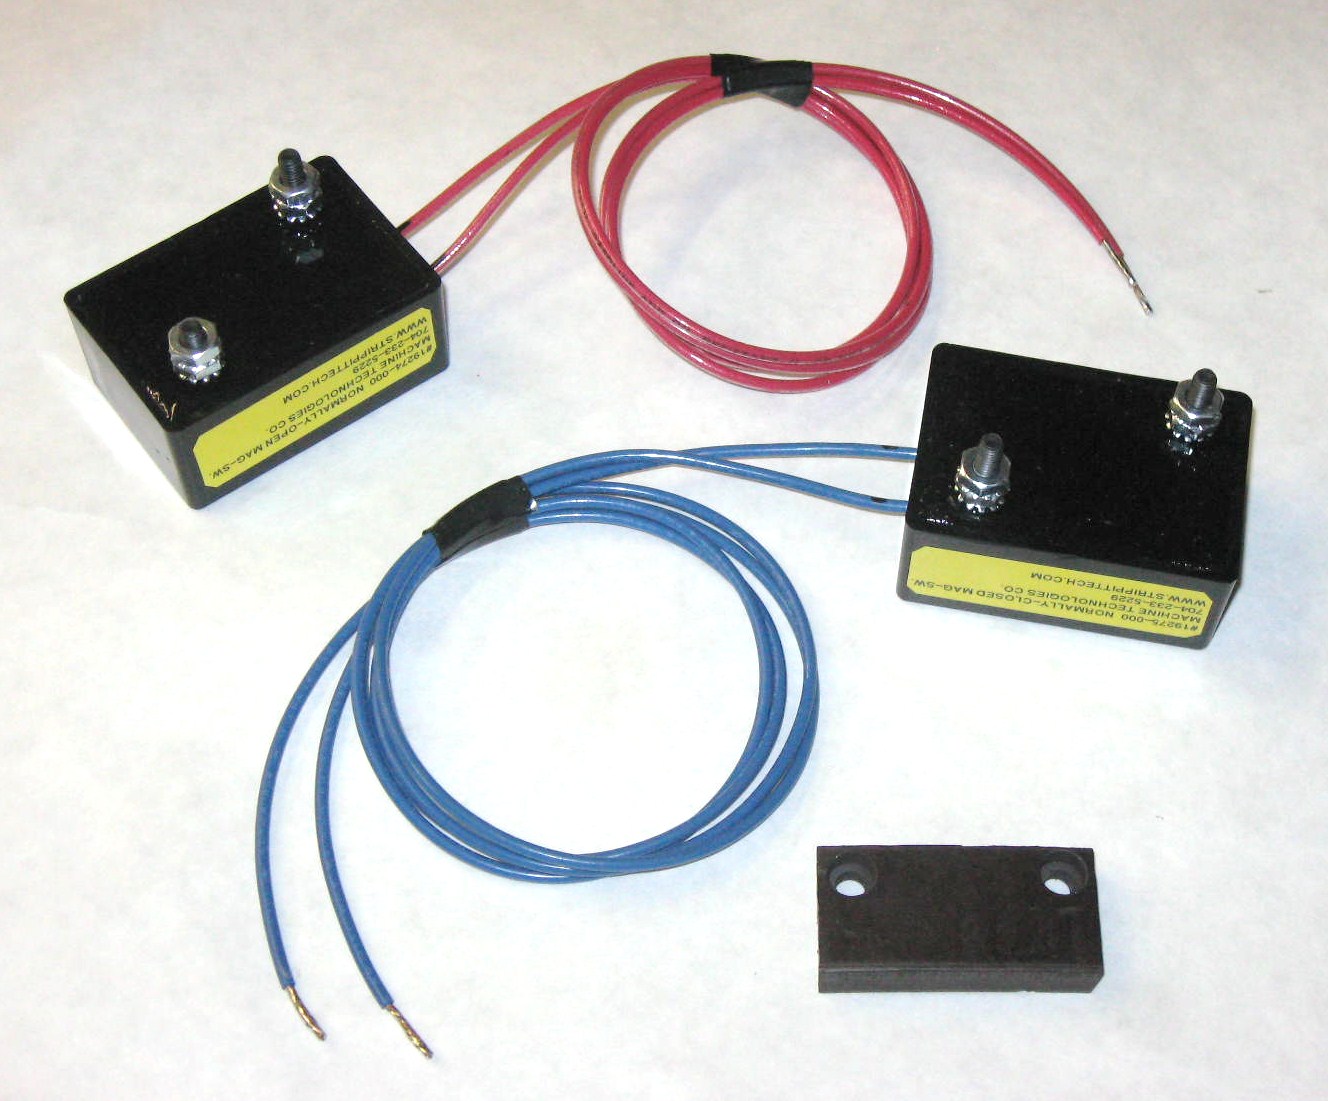
#19274-000 Normally-Open Switch (Red-Box Red-Wires Type) LS1 is on Left Side
#19275-000 Normally-Closed Switch (Black-Box Blue-Wires Type) LS2 is on Right Side
#105092-000 Magnet. 2 are used, 1 Magnet is Mounted on inside of each Flywheel.
After Over 80+ Years of Production, LVD (Ex-Strippit), In Their
Retarded Infinite Wisdom, NO Longer Makes Any Single-Station Machines At All!
Brand-New
1 1/4 Inch
Swing-Arm Holders
For-Sale!
These are
Made of Steel,
Not Brittle Iron!
To use Standard 1 1/4" Type Tooling you will Need 1 1/4" Swing-Arm Holder,
Shown Above, and 3 1/2" to 1 1/4" Die Adaptor, shown in Section 2 Below
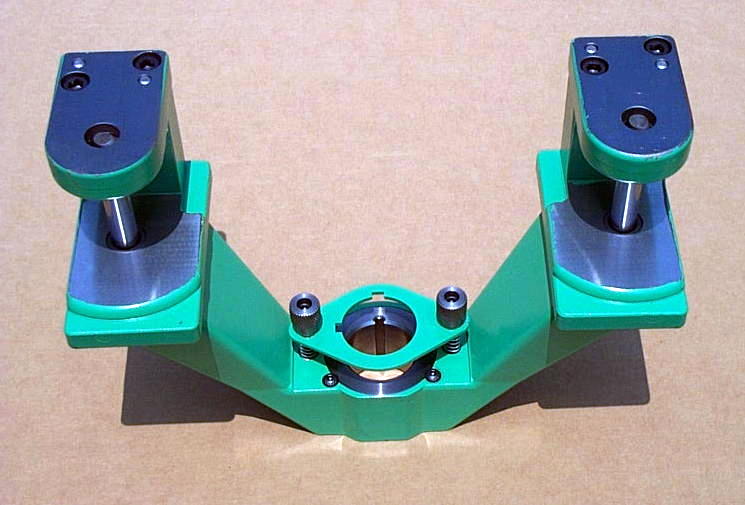
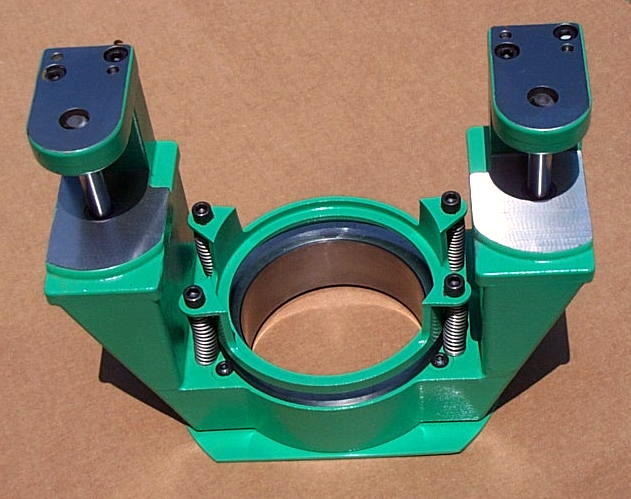
We Have Brand-New
3 1/2 Inch Swing-Arm Holders For-Sale!
These are Made of Steel,
Not Brittle Iron!
Newbies Now Listen Up!
To use Standard Strippit "Thin-Turret"
3 1/2" Type Tooling, Buy Tool-Set,
of Punch & Die & Stripper-Plate.
Then Install Punch & Stripper-Plate in
3 1/2" Stripping-Guide Punch-Holder
Assembly Shown at Right.
We have a few Good-Used 3 1/2"
Stripping-Guide Assemblies For-Sale.
You then Drop-In
3 1/2" Stripping-Guide Assembly, that is already Loaded with Your Punch & Stripper-Plate, in 3 1/2" Swing-Arm Holder and Lock-It In Tight with
Hooks & Handles into Machine.
Load Die and you are all set. Got It?
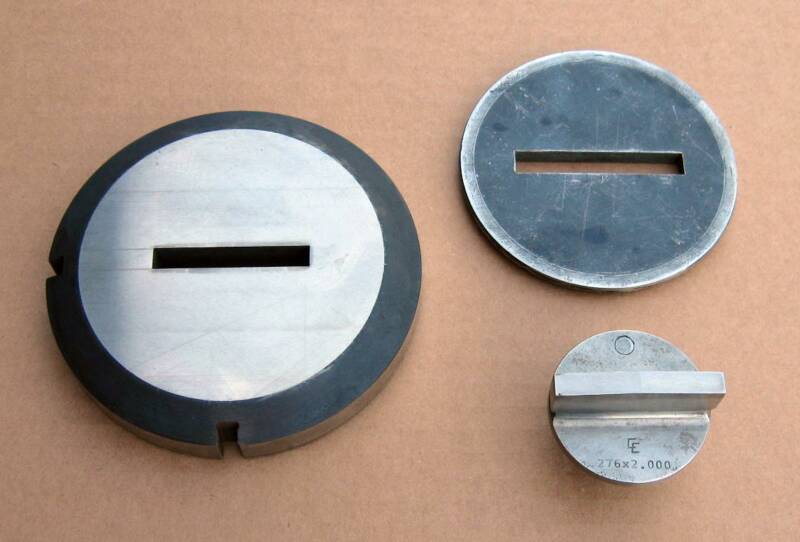
2 --- 5" to 3 1/2" & 5" to 1 1/4" Die Adaptors
40-TON Super & Custom 30/40 Machines came with 6 1/2" Wide Die-Opening
for 5" Dies. For 3 1/2" Dies, use 5" to 3 1/2" Die Adaptor.
For 1 1/4" Dies, use 5" to 1 1/4" Die Adaptor.
Teach Operators to NOT-Cross Punch & Dies as it can Break Die Adaptors!
The Following are Some Good Used Repair Parts that we have Gathered.
These are 1 of a Kind Parts, so if you need them, Buy Them NOW,
as when they are Gone, we are NOT likely to Ever have them again!
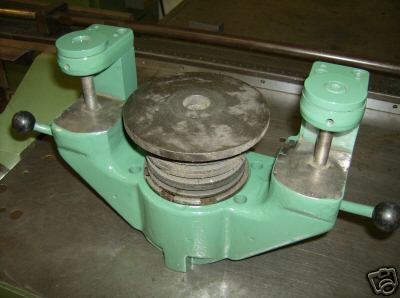
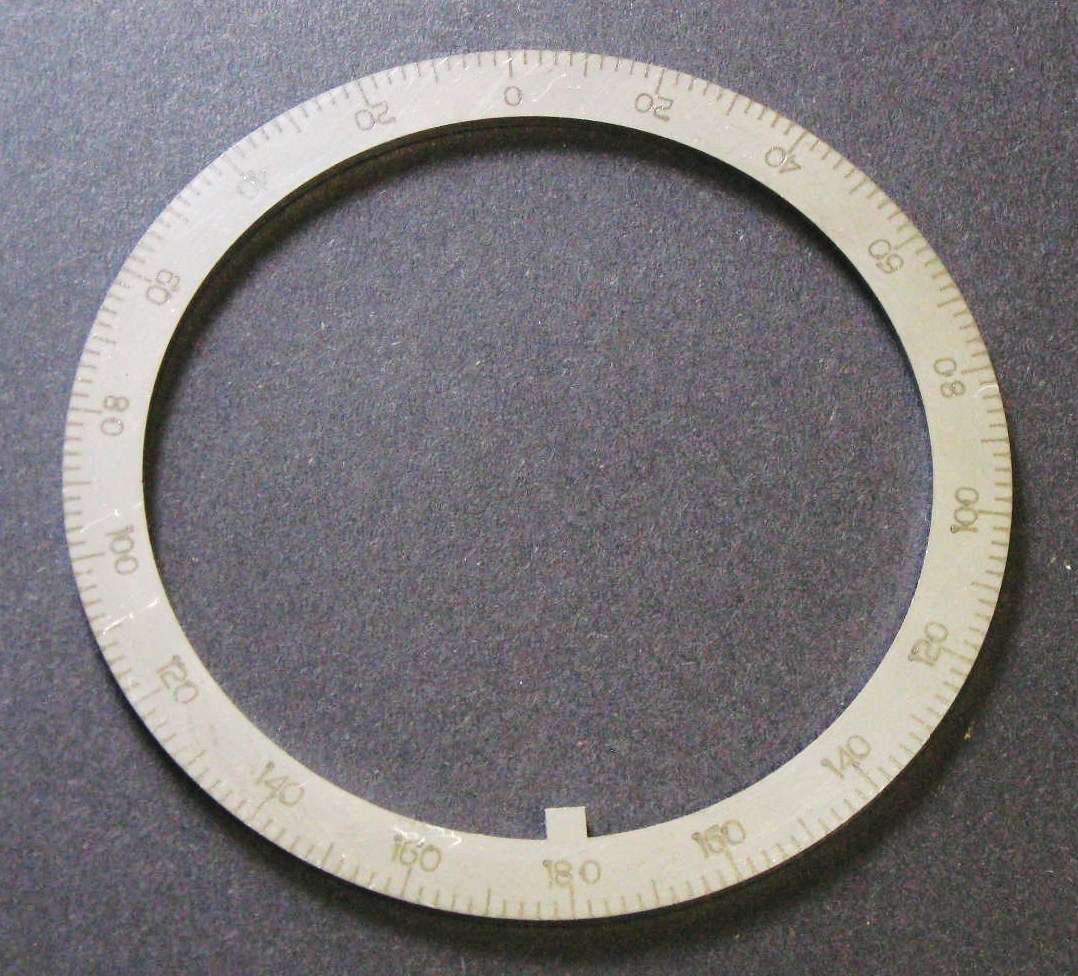
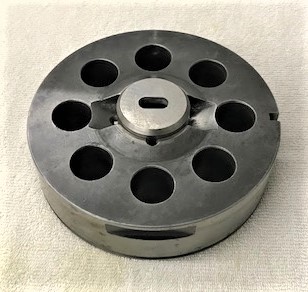
New Super 30/30
360-Degree Die Index-Ring
If your Die Index-Ring is
Broken or Missing we have a
Small-Stock of New
Stainless-Steel Index-Rings.
Note !
Ring Needs to be Aligned with
Index-Tool or Alignment-Tool
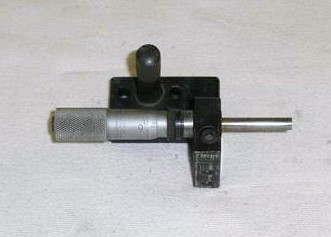
Barrel Micrometer
Gaging Stop Assembly with
No Knuckle-Head Protection.
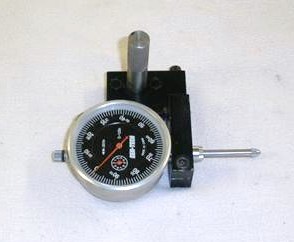
Dial Indicator
Gaging Stop Assembly
Slide-Stop
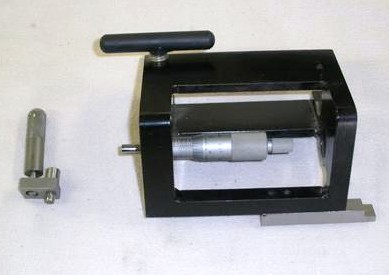
Barrel Micrometer Gaging Assembly.
Assembly has Protective Cage Around Micrometer so Knuckle-Heads can't
Smash it with their Sheetmetal Parts.
These 3 Gaging Stops are hard to find!
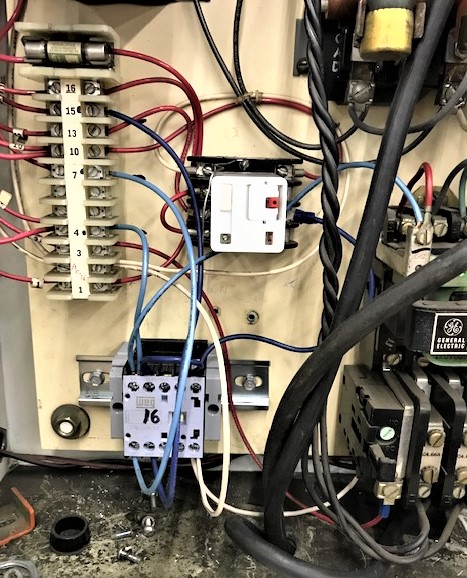
Shown Above, we Sell New #12125-000 White CR2 Relay & #49787-000 Gray Contactor to replace Original CR1 Relay that is Not Available. Strippit Machines were Wired Many Different Ways over 40+ Years of Production. So, we Cannot tell you Exactly how-to wire-in Replacement CR1. It's Not that hard, But Needs to be Installed by someone who Understands Electricity & Wiring as Wiring Variations to be Figured-Out at Installation!

My Friend Denis Porter in "California Shaker".
His Boat did 137 MPH in Less Than 8 Seconds in The 1/4 Mile Drag-Race.
He also Raced Flat-Track Harley's in Younger-Days and Flew Ultra-Lite Aircraft!
Denis Got His Last-Wish 7/9/10 at Speed in This Boat on Lake San Antonio, CA.
Rest In Peace Denis


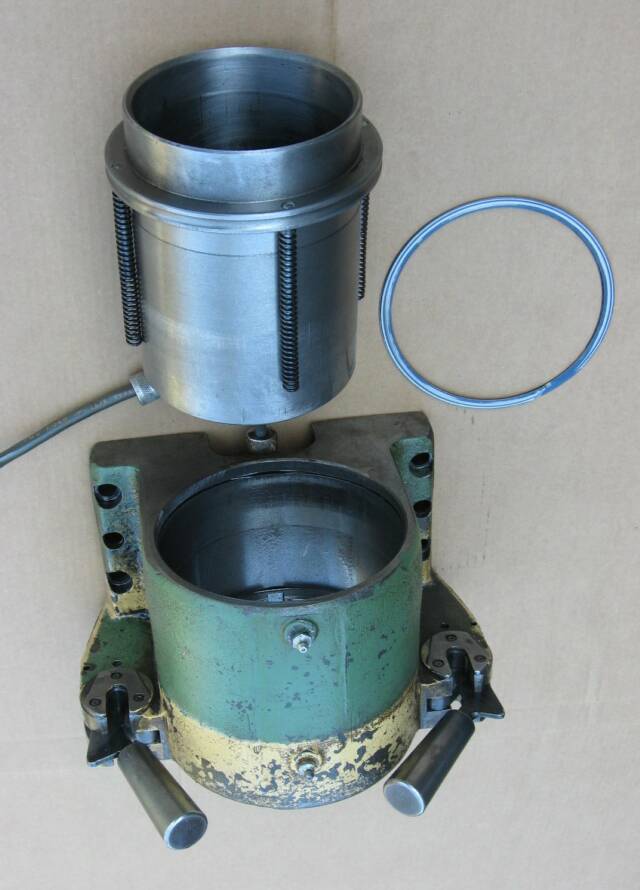
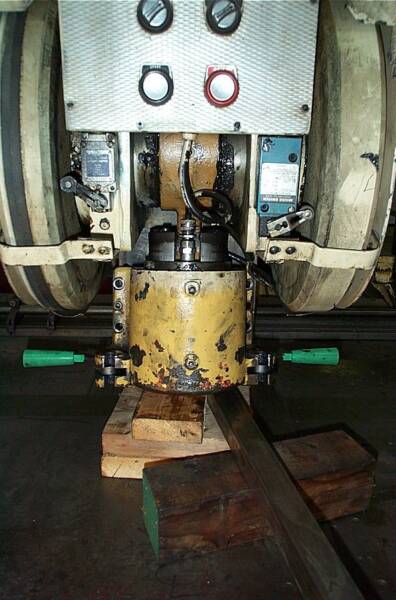
Remove Ram from Housing assembly to replace 4 Ram Springs.
Don't be like The Meat-Heads
that tried to Beat-Ram out of this Housing with a Sledge Hammer!
I had to have their Ram and Housing Re-Machined for $1000+ after their Attempts at "Repairs".
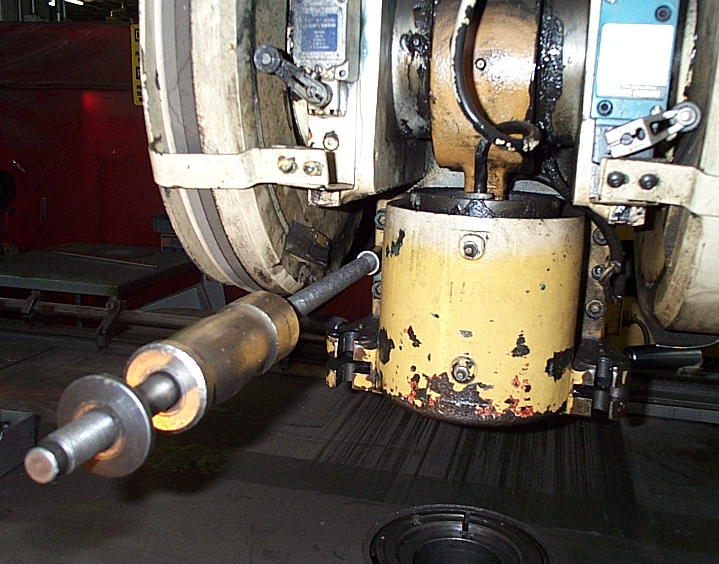
Take out Spiral Retaining-Ring First!
You can then Push-Out By-Hand or
Tap-Out with Brass-Hammer Ram.
Look at Diagrams in Your Manual
Before you try to take it Apart!
No Manual? Buy 1 Today!!!
Rams are often Ruined when bottom Striker-Plate gets Loose, But your Knucklehead Operator Keeps-On Punching-Anyway, until
Flat-Head Bolts Break and Bolt Hole Threads are Ripped-Out of Ram.
New threaded-holes can be Drilled & Tapped by a Good Machine Shop.
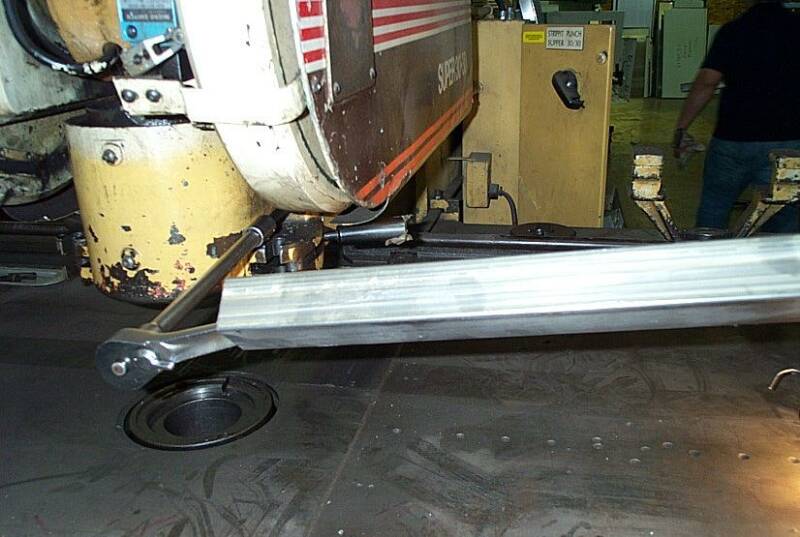
--- Make Sure Safety Interlock LS4 Switch Wires are
Not Pinched in Back of Housing when you Bolt-It back to Frame.
--- This Switch Assembly is Made-Up of several Parts that are Expensive & Difficult to get so Do NOT Damage Them!
--- Run a File Over Back of Housing & Machine Frame
Mounting to Eliminate All Burrs
that Cause Tool Miss-Alignment!
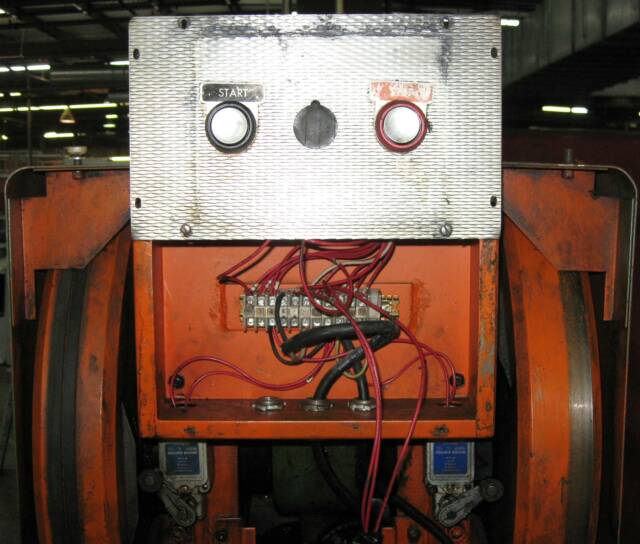
A Little Trick from
Dandy-Don Dahlin, R.I.P., from my Old Strippit Service Days.
When Trouble Shooting Electrical Problems, Take-Out
8 Control Panel Screws, Move
Panel Up and Re-Attach it to Top of Electrical Box with
2 of the Mounting Screws.
Now you can Run-Machine & Troubleshoot Electrical Problems while having Access to Switch Terminal-Strip.
Hint. Don't Leave Machine On
for Hours & Hours when Not
Using it, as Ram is Always Going Up & Down, About
60,000 Times a 8-Hour Shift,
Wearing-Out Switches, Ram Springs, & Packing-Rings!!!

Very Hard-To-Find
1 1/4 Inch Swing-Arm Tool Holder
in Very Good Condition.


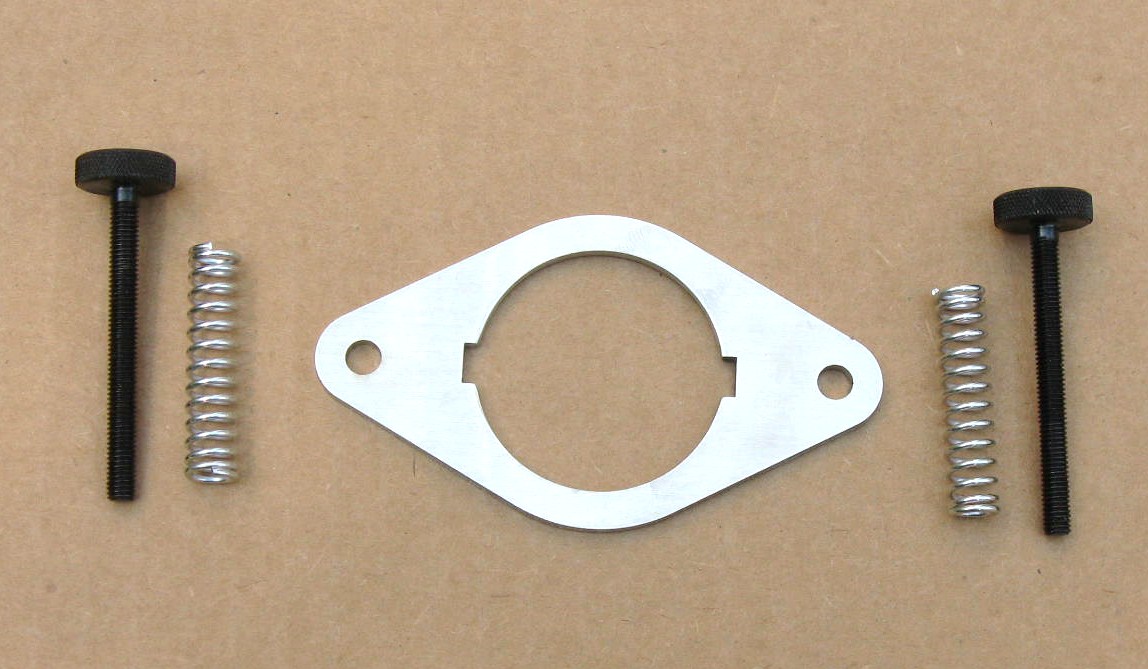
Hook & Handle Repair Kit
Only a Limited Quantity of
Hook & Handle Repair Kits are left!
LAST--CALL!
We are Making the LAST
BATCH of these Kits Now!
Hook & Handle Repair Kit has;
--- Left & Right Hooks
--- 2 Handle Cams
--- 2 Cam Retaining Screws
--- 2 Lock-Pins for 1 Swing-Arm
--- 4 Hook-Slot Roll-Pins, 2-Extra
--- 2 Pivot Roll-Pins
Very Hard-To-Find
3 1/2 Inch Swing-Arm Tool Holder
in Very Good Condition!

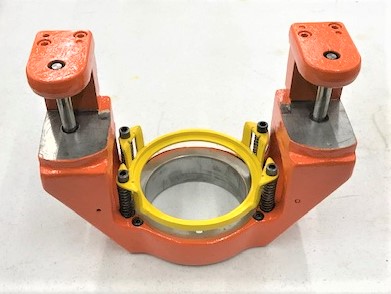
New Tool Lifter-Kit for
1 1/4" Swing-Arm Holder


New 3 1/2" Lifter-Kit for Old-Style
3 1/2" Swing-Arm Holders
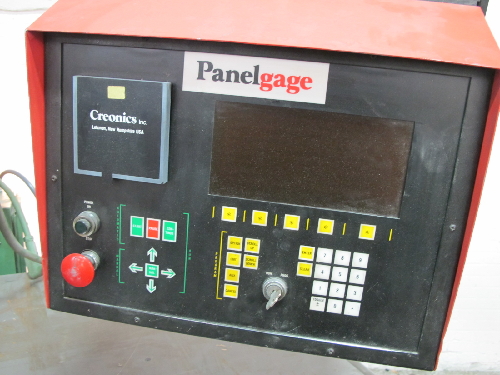
The Creonics Saga
In 1980's, a Company called Creonics Manufactured the "Panelgage" which was a Simple CNC Gageing System that could be Retrofitted In-Your-Shop to Various Machines, Including Single-Station Strippit Machines.
On Strippit's, the Original Strippit Mechanical Gageing System was Removed (And Then Promptly Lost) & Replaced with Programmable
CNC Gageing System. My Understanding is
when New (30+ years ago) these Systems worked quite well in certain applications.
However, I would NOT Recommend Buying a Machine with a Creonics, or any Other, Retrofit;
--- Creonics is Long Out-of-Business as they
were Bought Out by the Allen Bradley Co.
which is now part of Rockwell Automation Co.
--- The Retrofitters that did these are Long Gone
--- NO Creonics Parts & NO Service
--- As Machines have been Bastardized, so
Strippit will NOT work on Machines anymore.
--- Can NOT use Manual Gageing Anymore.
--- The Mechanical Parts to Convert Back to
Mechanical Gageing are NOT available.
Electronic Labs like; (Google "Creonics")
PLC Talk.Net Say they Repair Circuit Boards
But I Really Doubt it! Allen Bradley may Offer a Bit of Control Help. But, AVOID as You
are On-Your-Own with Retrofitted Machines!


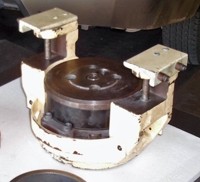
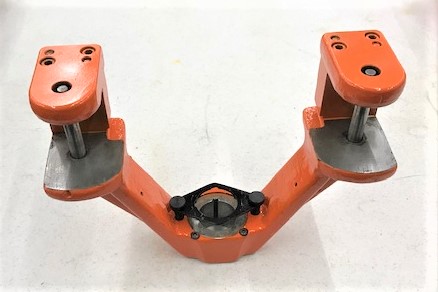
In the Early 1960's, Strippit used This
Old-Style 3 1/2" Swing-Arm Holder
in their S.A.F. Machines.
This Type Swing-Arm does NOT have a Tool-Lifter! Instead, it used Old-Style
3 1/2" Stripping-Guide with 4 Lifter-Springs Built-In to Lift Stripping-Guide.
Old-Style Stripping-Guides are NO longer available! You can NOT use
New-Style Stripping-Guide in a
Old-Style Swing-Arm as it does Not have Tool-Lifter! Old Swing-Arms can
be Machined to add Lifter-Kit to use New-Style Stripping-Guide Assembly.
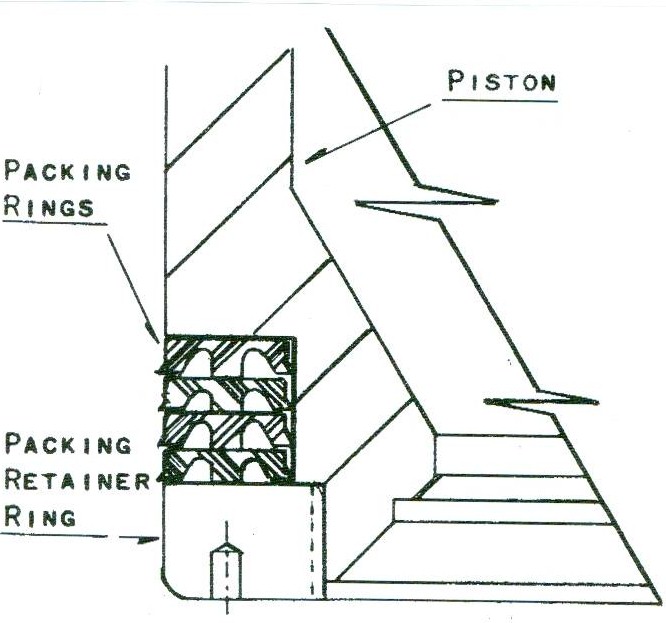
Install 4 Packing Rings Correctly !!!
Solid-Side of Each Ring Goes UP!
Open Lip-Side of each Ring goes DOWN!
Make Sure Retaining Ring is Screwed-On
VERY Tight. Nylon-Balls on Set-Screws or New Brass-Tip Set-Screws Hold Ring without Buggering-Up Piston-Threads! New Kits use Brass-Tip Set-Screws.

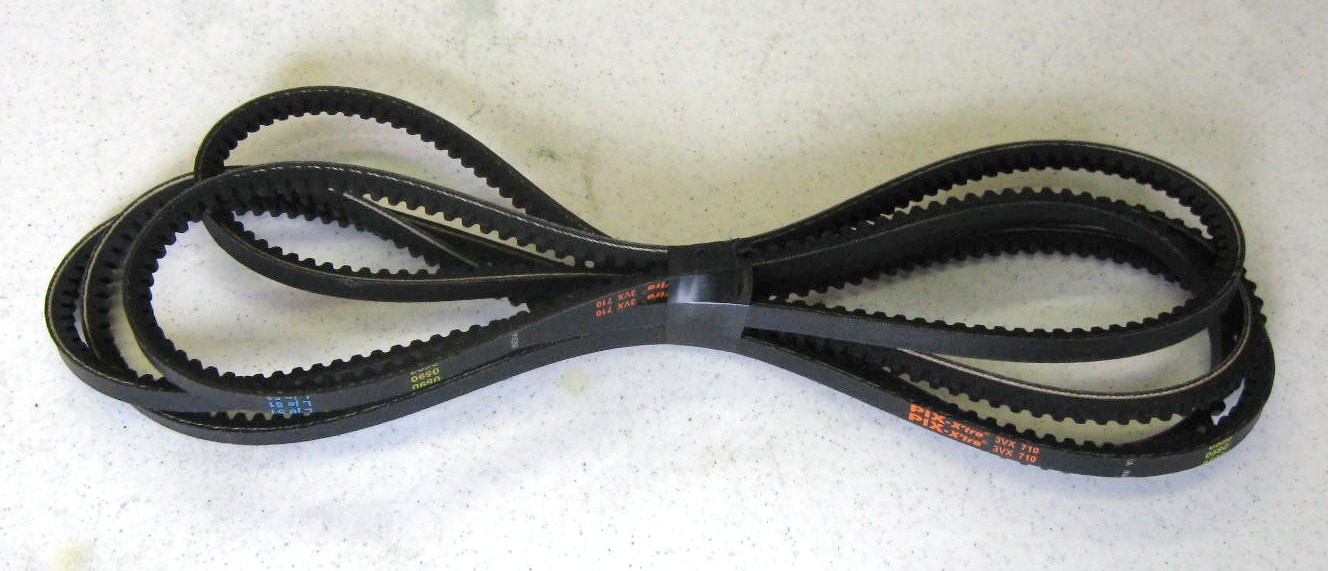
Don't Forget to
Replace the
2 Drive-Belts!
We Stock these
Drive-Belts Sets

If your Ram Retaining-Ring is
Missing, Bent, or Broken,
We now Stock the
Special Spiral Retaining-Ring
located at
Top of the Ram-Housing.

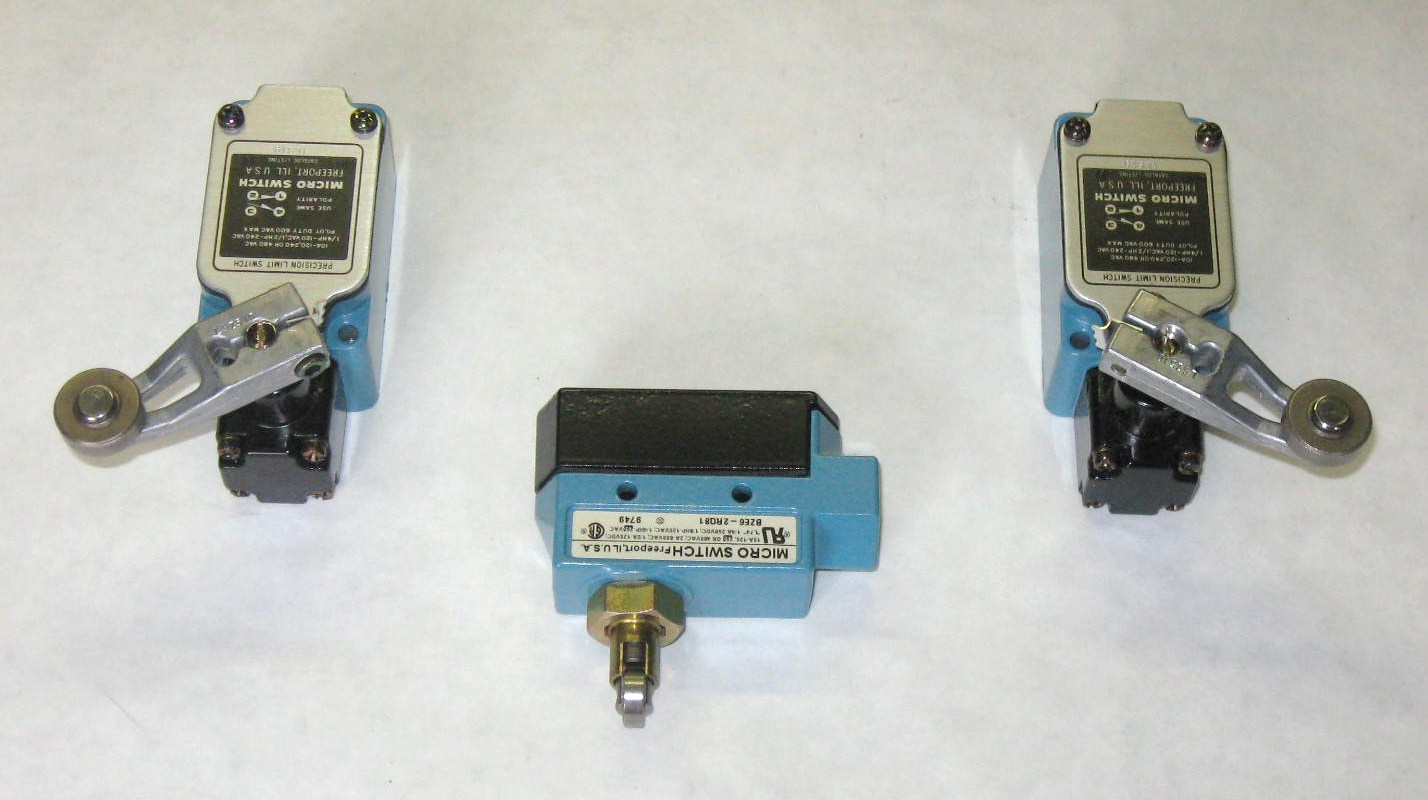
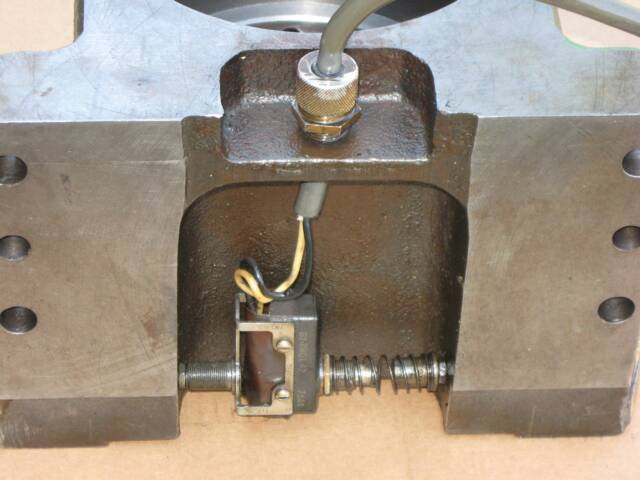
Proper Switch Actuation is Critical on these Punch Machines! "Off-Brand" Substitute Switches and Worn-Out Switches & Switch Arms Cause a Variety of Punching Problems.
When in Doubt we Replace LS1 (Left) & LS2 (Right) Switches with Part #49790-040. With Correct Switches, we Set Arm-Rollers to Not-Quite Touch Flywheel and Switch would Activate (Switch) Half-Way Up Cam. This ONLY Works With Correct 5-Degree
Switches! Put Drop of Oil on Center of Roller so it Rolls, & Not-Drags Cutting a Groove
in Cams. LS3 Double-Punch Prevent-Switch (Center) is Part #12979-000. Very Early 1960's Machines did Not have LS3 Switch & Wired Differently, LS2 wired Normally-Open!
Later Vertical-Type LS3 was added, Finally Changed to Horizontal-Type LS3 Switch.
We Stock The Correct
#49790-040 LS1, LS2, and #12979-000 LS3 Switches.
Note! A few Very
Early 1960's Machines had
LS3 Mounted Vertically
with a Vertical-Roller,
(Instead of Horizontal-Roller)
or even No LS3 Switch at all!
We Stock LS1 & LS2 Mag-Switches & Switch-Magnets
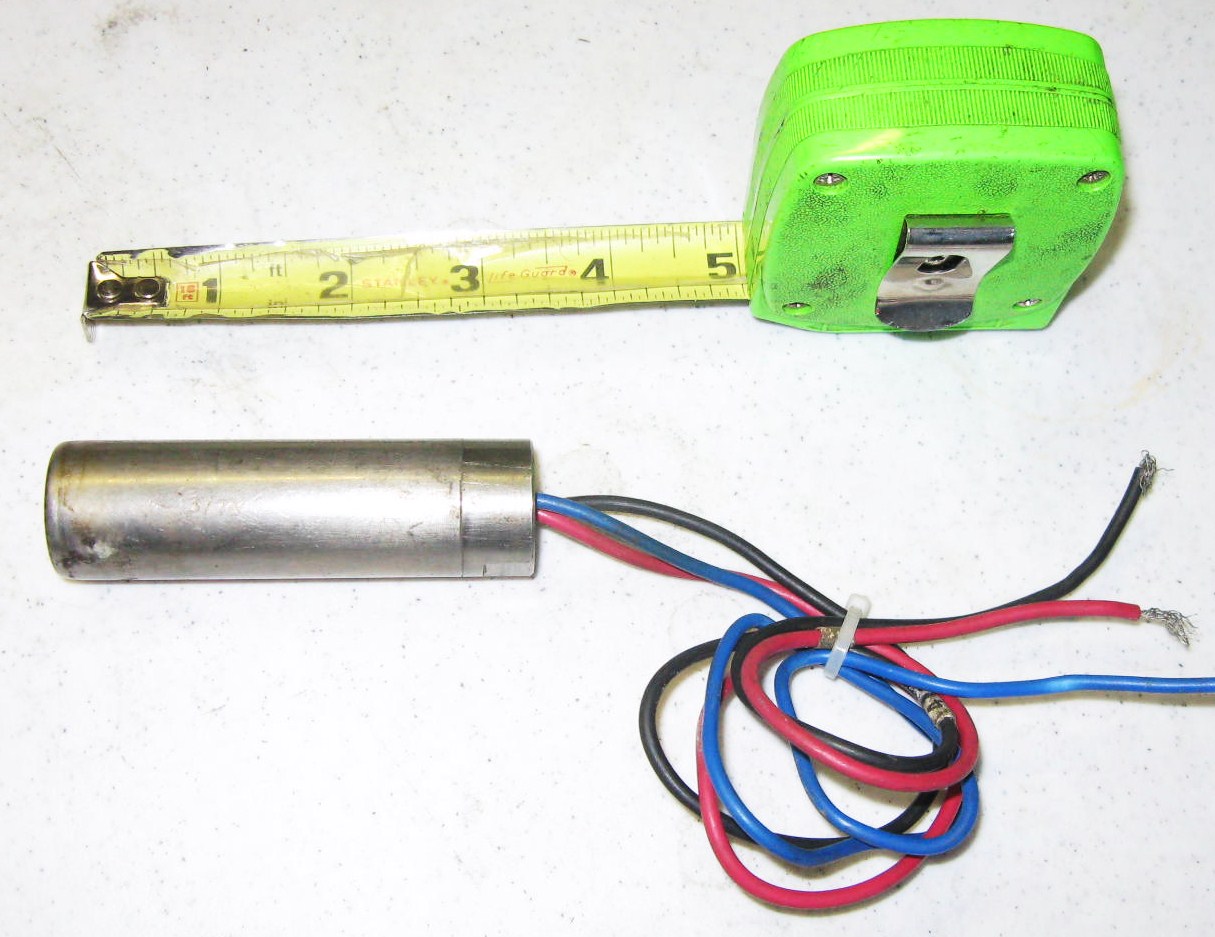
In the Late 1960's & Early 1970's Some
Single-Station Machines were built with 2
of these Early Magnetic Sensors that Detected Metal. Sensors did Not work well, have NOT been Manufactured for Decades, and are Not Available Anywhere.
These Old LS1 & LS2 Sensors were
1" x 3 1/2" Long.
When you have Trouble with these, you will Need to Install Mechanical Switches
or Mag-Switch Retrofit Kit to Repair.

Left & Right Handles
We have a VERY Small Stock of Handles, Shown on our
Super 30/30 Punch Head Rebuild Webpage.
REBUILD Your Handles
with New Cams in our
Hook & Handle Repair Kit Below!
Left & Right Hooks


We Do Have a Very Small Supply of Refurbished
1 1/4" and 3 1/2" Swing-Arm Holders, As Shown Below


Machine Technologies Co.
Strippit Single-Station Punch-Machine Repair-Parts and
Strippit CNC HECC80 Control & Turret Machine Service
Phone: 704-
233-5229
Have Your Machine MODEL Number AND SERIAL Number
From the Machine I.D.-Plate When You Call !
Emailing a PHOTO of Machine I.D.-Plate is VERY Helpful!
Email Address is strippittech
@hotmail.com
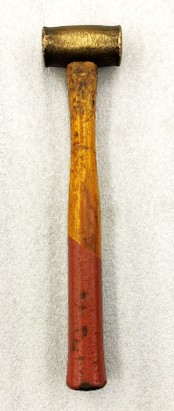
Finger-Stops! Finger-Stops are Normally
Tapped Back & Forth into Position.
Do NOT be a Knuckelhead using a Steel Hammer!!!
Get Brass Hammer #5978A52 from McMaster-Carr Co.