Strippit Workclamp-Assemblies
and Workclamp Repair-Parts
Machine Technologies Specializes In Repair Parts & Service
For Strippit HECC80 Control CNC Turret Punch Press Machines
We Carry a Complete-Line of Strippit Workclamps
and Workclamp Repair-Parts for the Following
6 Machine Groups.
Call for
Complete Workclamp-Assemblies
and
Workclamp Repair-Part
Pricing & Availability.
Phone: 704-
233-5229


This page was last updated: January 15, 2026
Standard Strippit Original Workclamps have a Machined
"Knife-Edge" Upper Jaw that does Not hold Part-Sheets very well.
We Stock and Recommend
"Carbide-Tooth Upper-Jaws"
that Hold 3 Times Better
than Original Strippit "Knife-Edge" Type.
Carbide-Teeth Jaws Especially Work Well on Hard-to-Hold
Large & Thick Steel & Stainless-Steel Sheets,
which tend to "Pull-Out" of Standard Workclamp Jaws.
How Many More Big Sheets of Expensive Metal Do You Want To Waste?
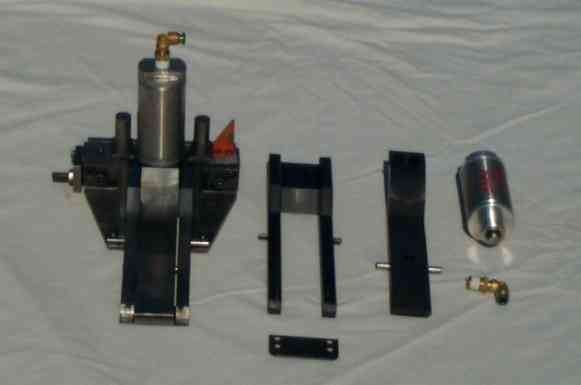
We also can Provide
New, Used, and Rebuilt Complete Workclamp Assemblies in both
Standard-Long Workclamps
and
Short-Type Workclamps.
Short-Workclamps Gage-Sheets at 0.750" from Carriage
so allow 9 inch Wider Part-Sheets in the Y-Axis on
FC1000/1, FC1000/2, FC1000/3 can hold Standard 48 inch Wide-Sheets
and FC750 & FC750/2 can hold 39 inch Wide-Sheets.
And Allow 10.5" Wider Part-Sheets on FC1250/30/1500 Machines
so they can now Hold 60 inch Wide-Sheets.
MACHINE
MODEL;
FC750
FC750/2
FC1000/1
FC1000/2
FC1000/3
FC1000XT
FC1250/30/1500
FC1250/30/1500- LaserTool
Blanking Center
FC51/30
FC51/40
FC1250/30
FC1250/45
FC1250/45/72
630R
1000R
1000R2
1000/20
1000R/20
1000XP
1000XP/20
1000H20
1250R
1250R2
1250XP
1250XP20
1250H20
CAP1000
CAP1250
HPM1000
DiAcro QCT-20
1000S
1000SX
1000SXP
1000SXP/30
1000H30
1250S
1250SXP
1250SXP/30
1250M
1250MH
1250MXP/30
1250H30


Workclamp Lengths
and
Y-Axis Zeroing.
For the FC750, FC1000/1, FC1000/2, FC1000/3, FC1250/45, FC1250/30/1500,
R & H Series, S Series, and Cap1000 Type Workclamps, Strippit has NEVER
Manufactured Workclamps or Workclamp Bodies to Any Particular Length!
When Building a New Machine, Strippit would take a Pair of Workclamps with Upper & Lower Jaws Removed and Clamp them in a Special-Jig holding them Back to Back Pointing Upward in a Large Surface Grinder. Then Grind 4 Ends of 2 Workclamp
Bodies so they were Same Exact Length and did Not Care what this Length was.
Just that they were the Same Length. This would insure that Work Piece Part was
held Straight and Not Cocked Out-Of-Square by Different Length Workclamps.
Note, Whenever Just 1 Workclamp or Workclamp Body is Replaced, You MUST Grind Both Workclamps to Same Length or your Parts will be Out-Of-Square on Machine.
This is Minimized if you Replace Both Workclamps at the Same time, as Length of 2 Replacements will Probably be Close, but Not Perfect. You can also try to Grind the Longer Workclamp Body to match Shorter Workclamp body.
It's Away's Best to Grind them to Same Length, and then Rezero Y-Axis.
Workclamps were then Reassembled, Put back on Machine and Spread Apart 3 Feet
or so. A Piece of Metal was put into Clamps and then you Punched a Hole between
Workclamps with 2x2 Inch Notch-Tool 3 Inches (Y 3.000) from Edge of Sheet.
With the 1 inch Offset from Center-Line of 2x2" Tool, you should have a
2.000" dimension from Punched Hole to Sheet Edge.
If Not, You Need to "Zero" the Y-Axis Home Dimension.
Also Note, Every Time you Un-Bolt & Remove a Axis Servo Motor, Ballscrew,
Ballscrew-Coupling, Resolver Feedback Package, Resolver-Coupling, Etc.,
Your Axis will Need to be "ReZeroed" again!
---------------------------------------------------------------------------------------------------------------------------
On HECC80 & "A" Control Machines
you Adjust Y-Axis Resolver inside Feedback Package on the End of Servo Motor.
I do this the Following Way. Say your Measured Dimension was 1.988 instead of expected 2.000 (we will assume that your Y-Ballscrew is Tight with No-Slop in it).
This means that the Part went In .012" Too Far.
So using a 1 Inch Dial Indicator mounted on a Magnetic Base, With
Machine-On & Holding Axis Position, put Dial Indicator-End against the Y Carriage.
Now take Cover-Plate off End of Feedback Package,
Loosen 2 Screw-Keepers holding the Resolver and Carefully Turn Resolver Slowly.
Y-Axis will Move & Track Movement of Resolver Rotation.
Watching Dial Indicator, Turn Resolver until Y-Axis Moves-Out .012".
Tighten 2 Screws. Not Too-Tight or you will Strip-Out Small Screw Threads!
Now Punch another Test Hole to Check if you Adjusted Correctly.
---------------------------------------------------------------------------------------------------------------------------
On the Above Types of Strippit Machines with Fanuc Controls, "Zeroing" is Accomplished by changing Y-Axis Offset Number in Control's Parameters.
See your Strippit Manuals for Parameter Location and Procedure for Changing
Parameter Offset Number, as it Varies with Fanuc Control & Machine Model Type.
---------------------------------------------------------------------------------------------------------------------------
On S-Series of Machines, Strippit finally got a Little Smarter. S-Type Workclamps have a Gage-Block that Sticks Out from Workclamp Body. So if 1 Workclamp is "Longer" than the Other, you can Unbolt Gage-Block from Longest Workclamp and
Grind Block Shorter to Match Total Overall Length of Shorter Clamp.
Then Punch a Test Hole and Change Offset Parameter, if Necessary.
---------------------------------------------------------------------------------------------------------------------------
Again, As Workclamps are NOT Manufactured to any Particular Length,
Above Procedures MUST be Performed Whenever a Workclamp or
Workclamp-Body Repair Part is Replaced!
CAUTION!!! CAUTION!!! CAUTION!!!
When Adjusting Resolver Feedback Package with the Machine-On,
A Loose Connection or a Broken-Wire could Cause the Axis to
"Oscillate" or "Run-Away" at Hi-Speed!
Use Extreme Caution!!!
Always Keep Your Hands Away from ANY Point Where
Y-Carriage Movement Could "Pinch" Your Hands,
As Extreme Injury Could Result!!!


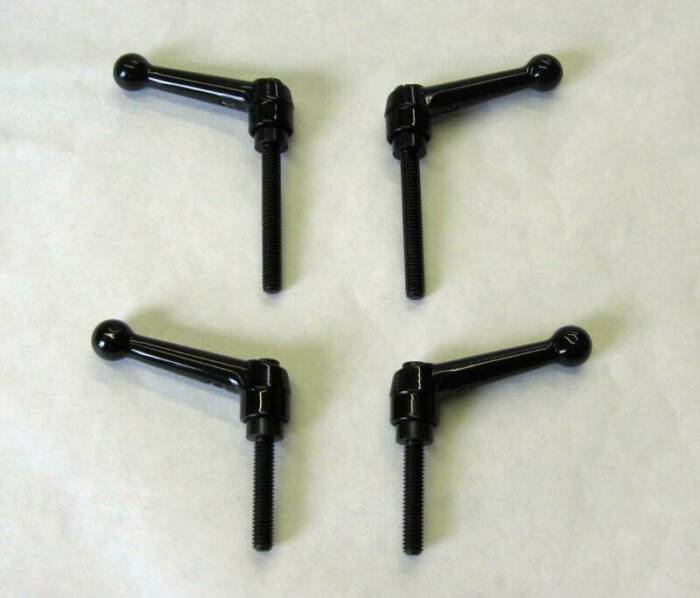
Are You Sick & Tires of Looking for a Allen Wrench
Every Time you need to Move a Workclamp?
Then You Need a Set of Our
Quick-Adjust Workclamp Handles for Quick & Easy Workclamp Set-Up!
We Now Stock 4 Types of Ratchet Handles;
Type-1 For FC1000/1, FC1000/2, FC1000/3, FC1000XT, FC750, FC750/2
Type-2 For FC1250/30/1500 and FC1250/30/1500 LaserTool
Type-3 For "R", "H", "XP", and CAP1000 Machines,
Specify Type-3 INCH or Type-3 METRIC on These Machines,
as Strippit Stupidly Made them Both Ways, Just to Confuse Everyone.
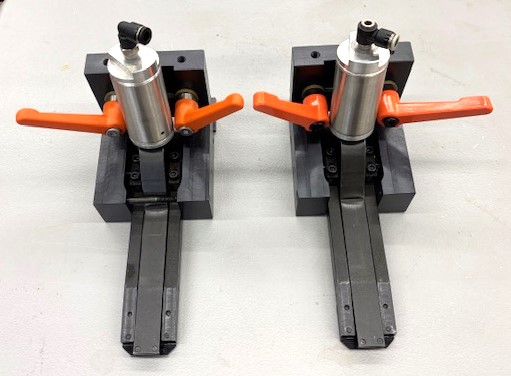
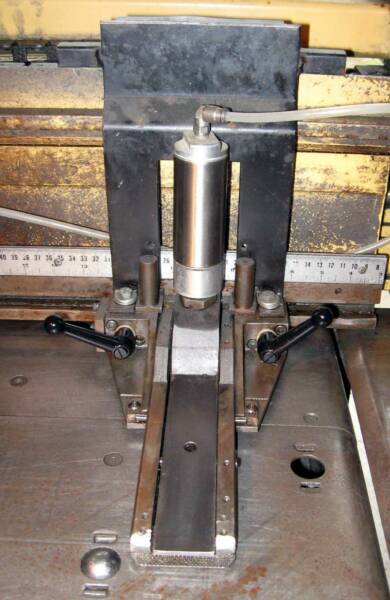
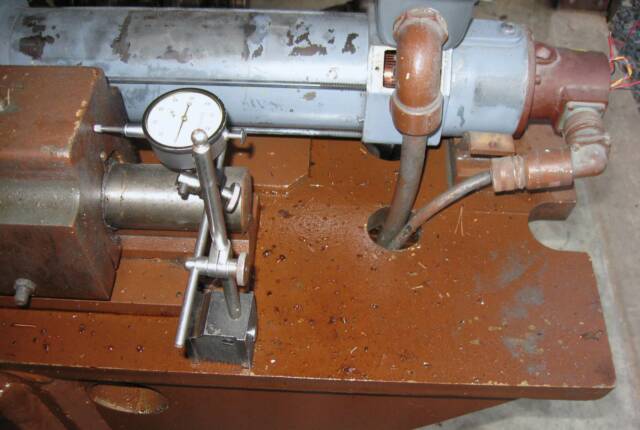
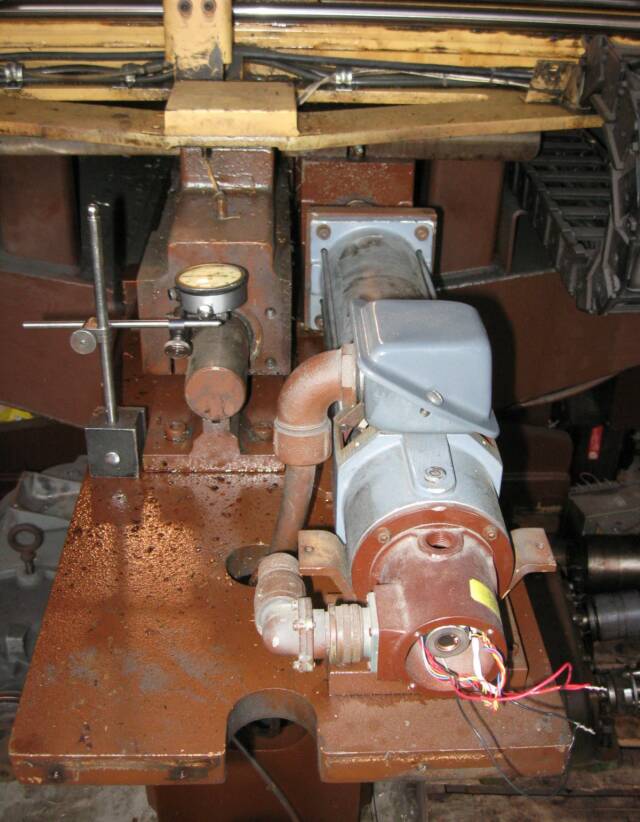
At Left,
is a Set of
Quick-Adjust
Handles
on a
Strippit FC1000/3 Workclamp.


X-Axis Zeroing
X-Axis Zeroing is Completely Different than Y-Axis Zeroing!
1 -- First "Home" X-Axis. End of X-Carriage should Stop 1 Inch PAST the Sidegage Gage-Surface. Use a Piece of Sheetmetal as a Square, put it against Carriage where Workclamps are Mounted and Slide it up to the Sidegage.
Measure Distance from End of Carriage to the Sheetmetal Edge.
If not 1 Inch, adjust the X-Resolver, or Fanuc Control Parameters, until it is 1 Inch.
This Sets-Up Proper Axis-Slowdown & Axis-Limit Positions for Full Carriage Travel.
2 -- Go to "Load" Position. Put in a Piece of Sheetmetal, and Punch a Test Hole.
Like on Y-Axis, I use a 2"x2" Punch, and Punch a Hole near the Sheet Edge.
Measure edge of Hole to edge of Sheet. If not within acceptable accuracy,
say .002", Grind-Down or Shim-Out the Sidegage Surface-Pad, Depending on
Direction of Error. Punch another Test Hole to Confirm your "Zeroing" of Axis.
NOTE !!! Strippit has made Dozens of Different
"1000" Type Machines over the last 40 Years!
Read Your Machine Model-Number & Serial-Number
On Machine's I.D.-Plate So You Order Correct Parts!
"Click-On" The Correct-Button at Right
for Your Machine WorkClamp Info!


!!! NOTE !!!
After 30+ Years, we are
Closeing Down our Workclamp Machine Shop!
If you NEED Workclamp Repair Parts
ORDER THEM NOW!
When our Existing Stock is Gone
There Will Be No More Workclamp Parts!


My Last Pair of NEW WORKCLAMPS FOR
630R
1000R
1000R2
1000/20
1000R/20
1000XP
1000XP/20
1000H20
1250R
1250R2
1250XP
1250XP20
1250H20
If you Need New Workclamps for your
20-Ton Strippit Machine, Buy Them Now and
I'll give you the Last Pair Discount!